> ## Documentation Index
> Fetch the complete documentation index at: https://docs.getayna.com/llms.txt
> Use this file to discover all available pages before exploring further.
# Create Custom Templates
## What are Templates?
Templates are pre-defined photoshoot setups that help you create consistent visuals at scale. You can choose from our library of **150+ pre-saved templates** or create your own **Custom Templates** for different garment categories, each with a fixed combination of models, poses, backgrounds, and styling.
## Benefits of Custom Templates
* **Saves time:** Avoid selecting models, poses, and backdrops manually for every garment.
* **Ensures consistency:** Maintain the same visual identity across SKUs.
* **Brand-specific output:** Create unique looks aligned with your brand language.
* **Flexible editing:** Modify template elements anytime as your needs evolve.
## Credit Consumption of Templates
Templates do not have a fixed cost, Credits are consumed based on the **number of poses added**:
* **1 pose = 5 credits,** so if you wish to create 4 poses in a template = 20 credits. There is no limit to the number of poses in a template.
You can edit existing templates without additional charges, However, adding new poses will consume **5 credits per pose**. Other elements like model, footwear, or accessories can be adjusted without additional template charges.
## Step 1: Select Your Product
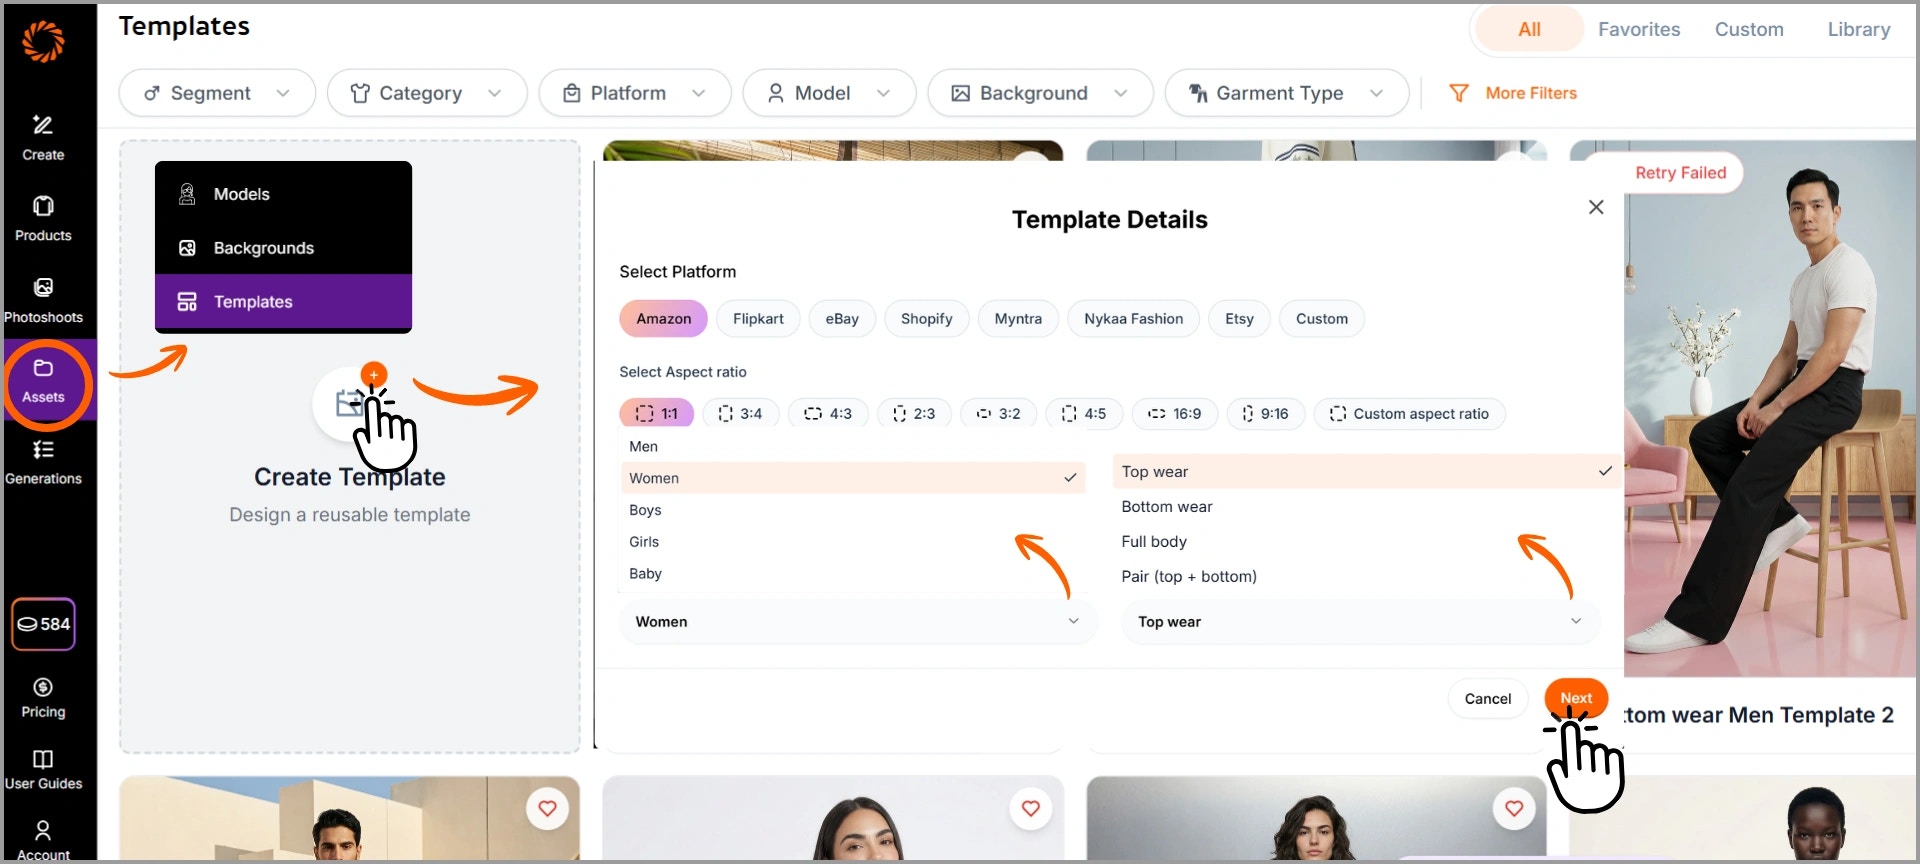
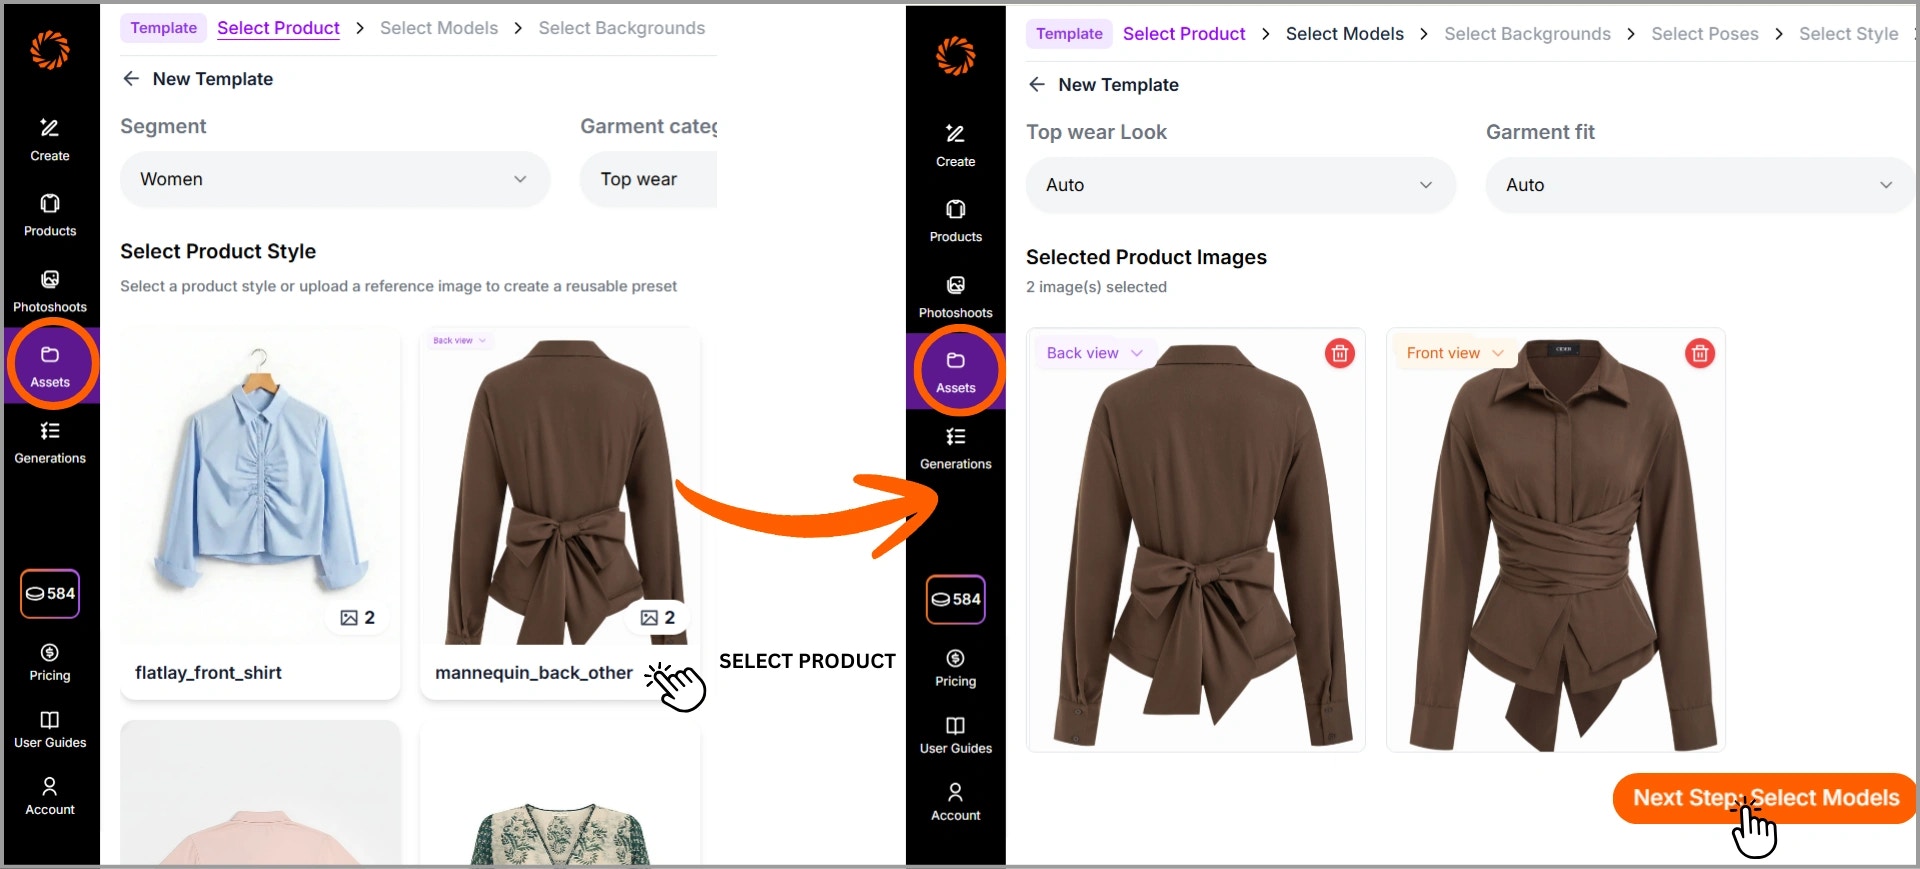
Go to the **Assets** section and select **Templates**. Click on Create Template, select the **segment** and **garment category** (e.g., Women – Top Wear), select your product from the library or upload product images (front/back views).
 Once the product images are selected, click **Next Step: Select Models** to continue.
 ## Step 2: Select Model, Background and Poses
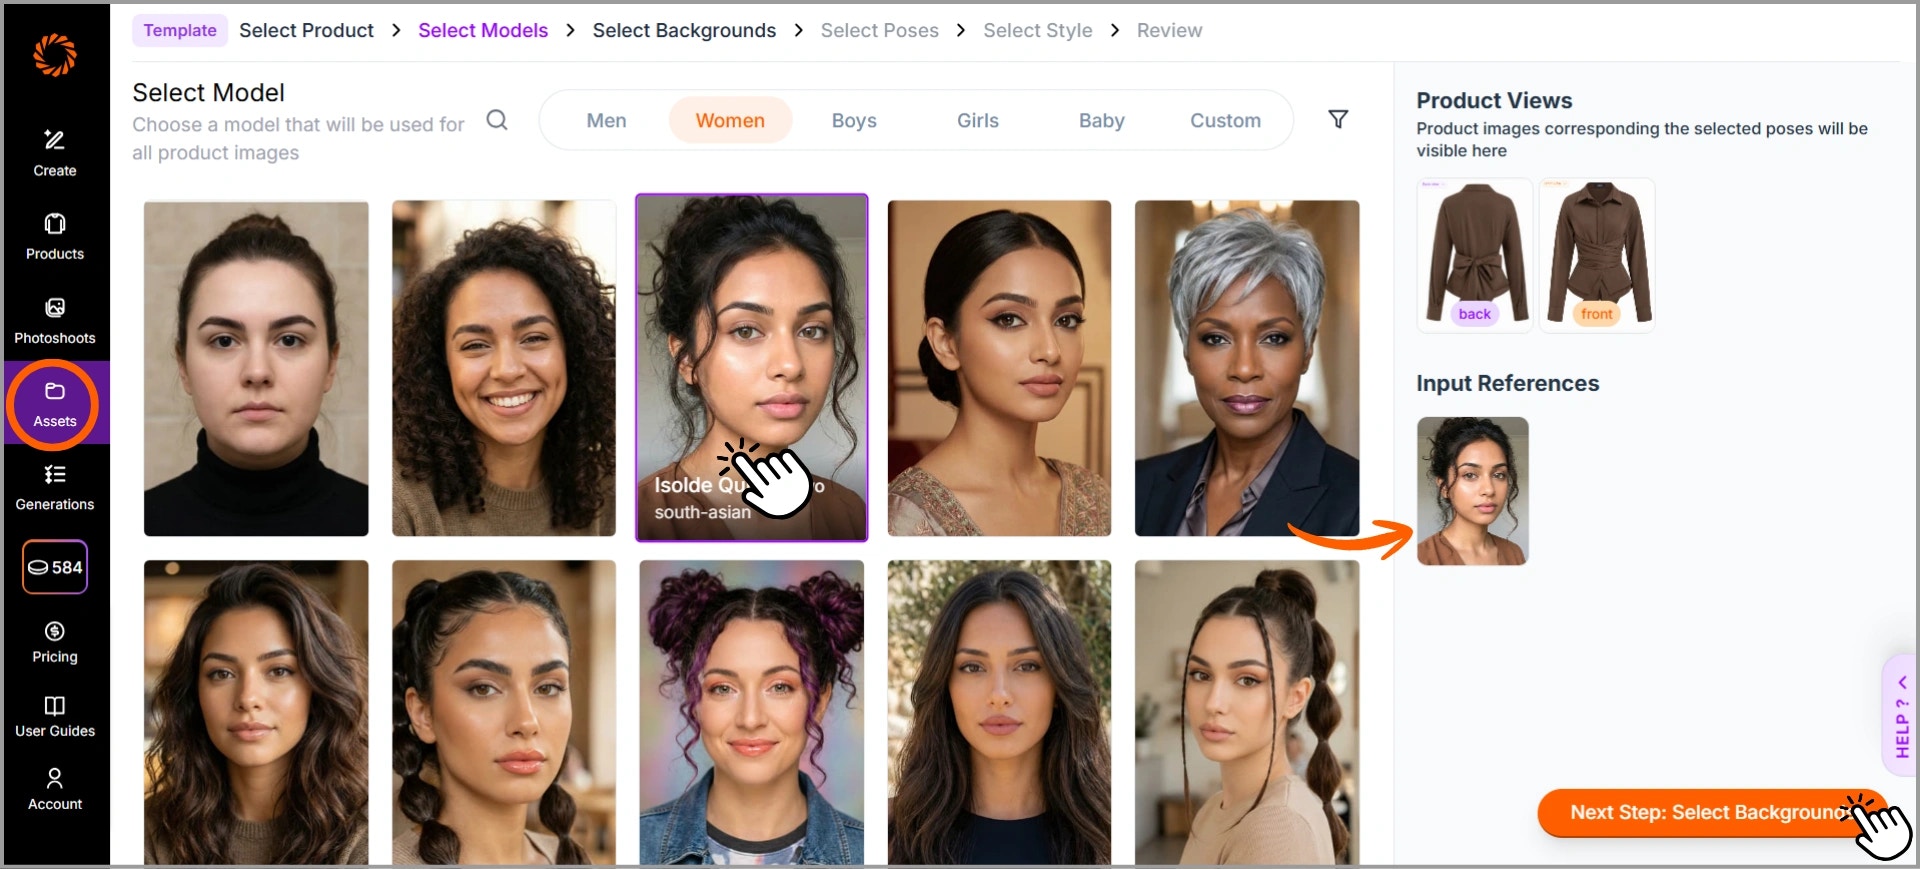
**A) Choose Model -** Filter by Gender, Age, Ethnicity, Body Type, or Hair Type and select the best fit. The model will appear in Input References.
## Step 2: Select Model, Background and Poses
**A) Choose Model -** Filter by Gender, Age, Ethnicity, Body Type, or Hair Type and select the best fit. The model will appear in Input References.
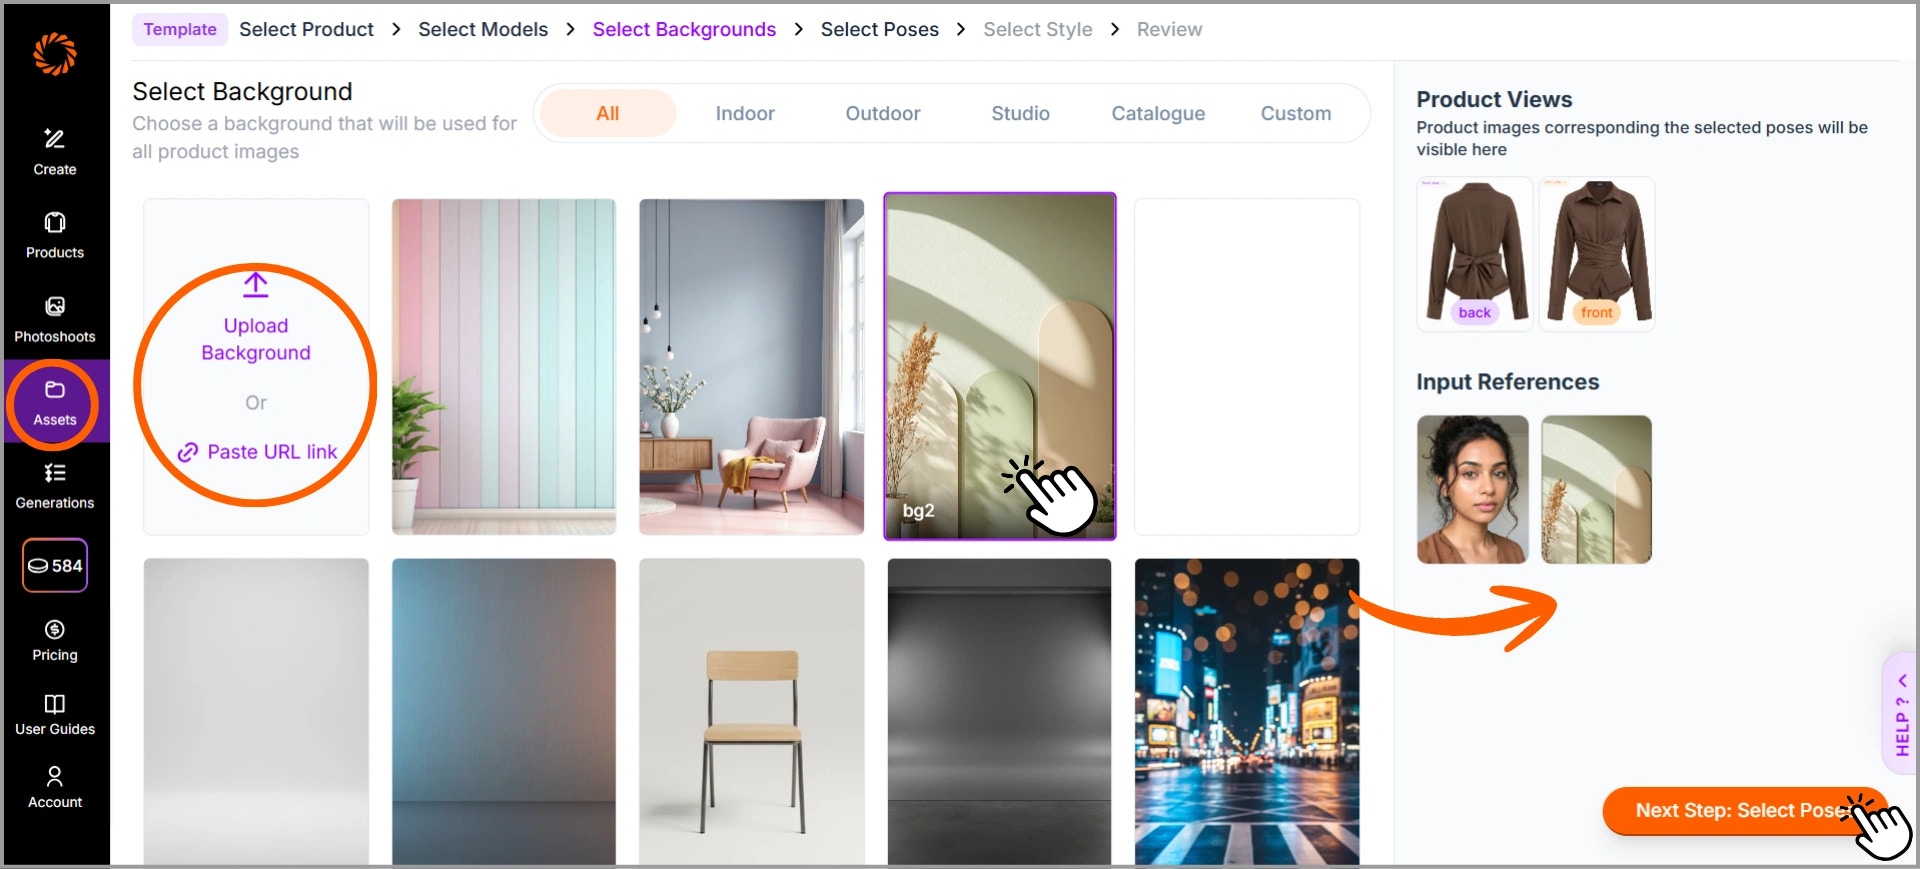
 **B) Choose Background -** Pick from Indoor, Outdoor, Studio, or Catalogue, or upload/paste your own images that complements your brand theme.
 **C) Choose Poses -** Select up to 10 poses using All, Front, Back, or Side filters. Chosen poses will appear in Output Slots.
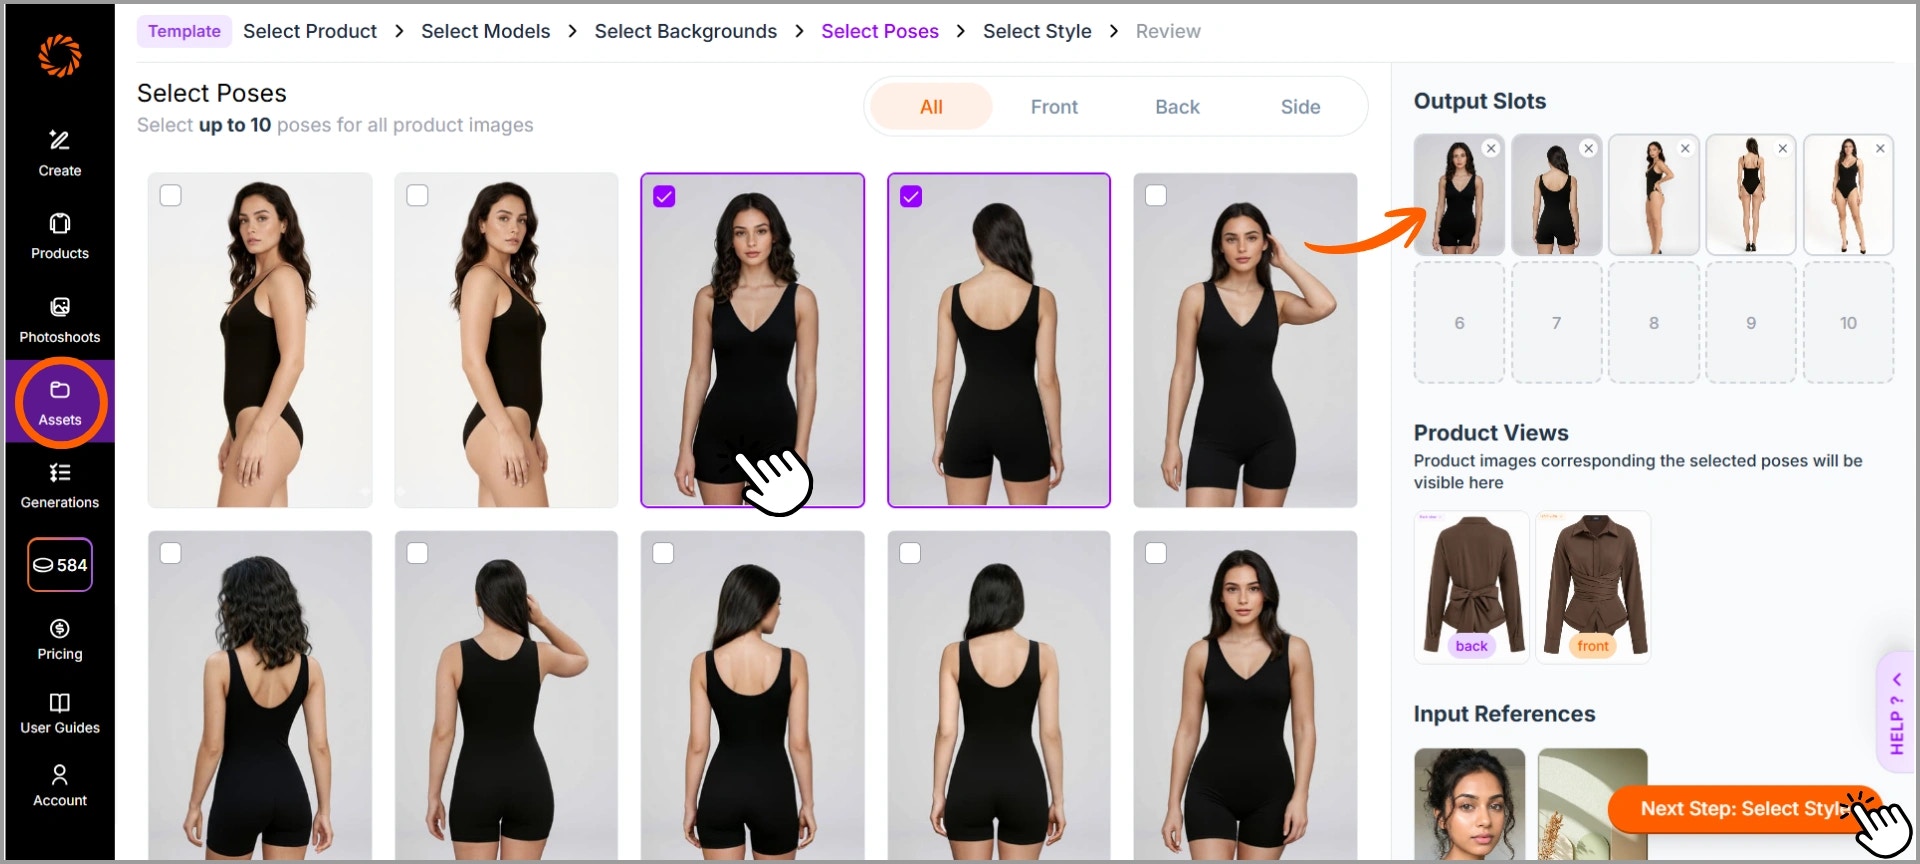 Once you have finalized your selection, click on **Select Style** to continue.
## Step 3: Select Style
Enhance your look by adding matching items such as **Accessories, Footwear, and Bottom Wear**.
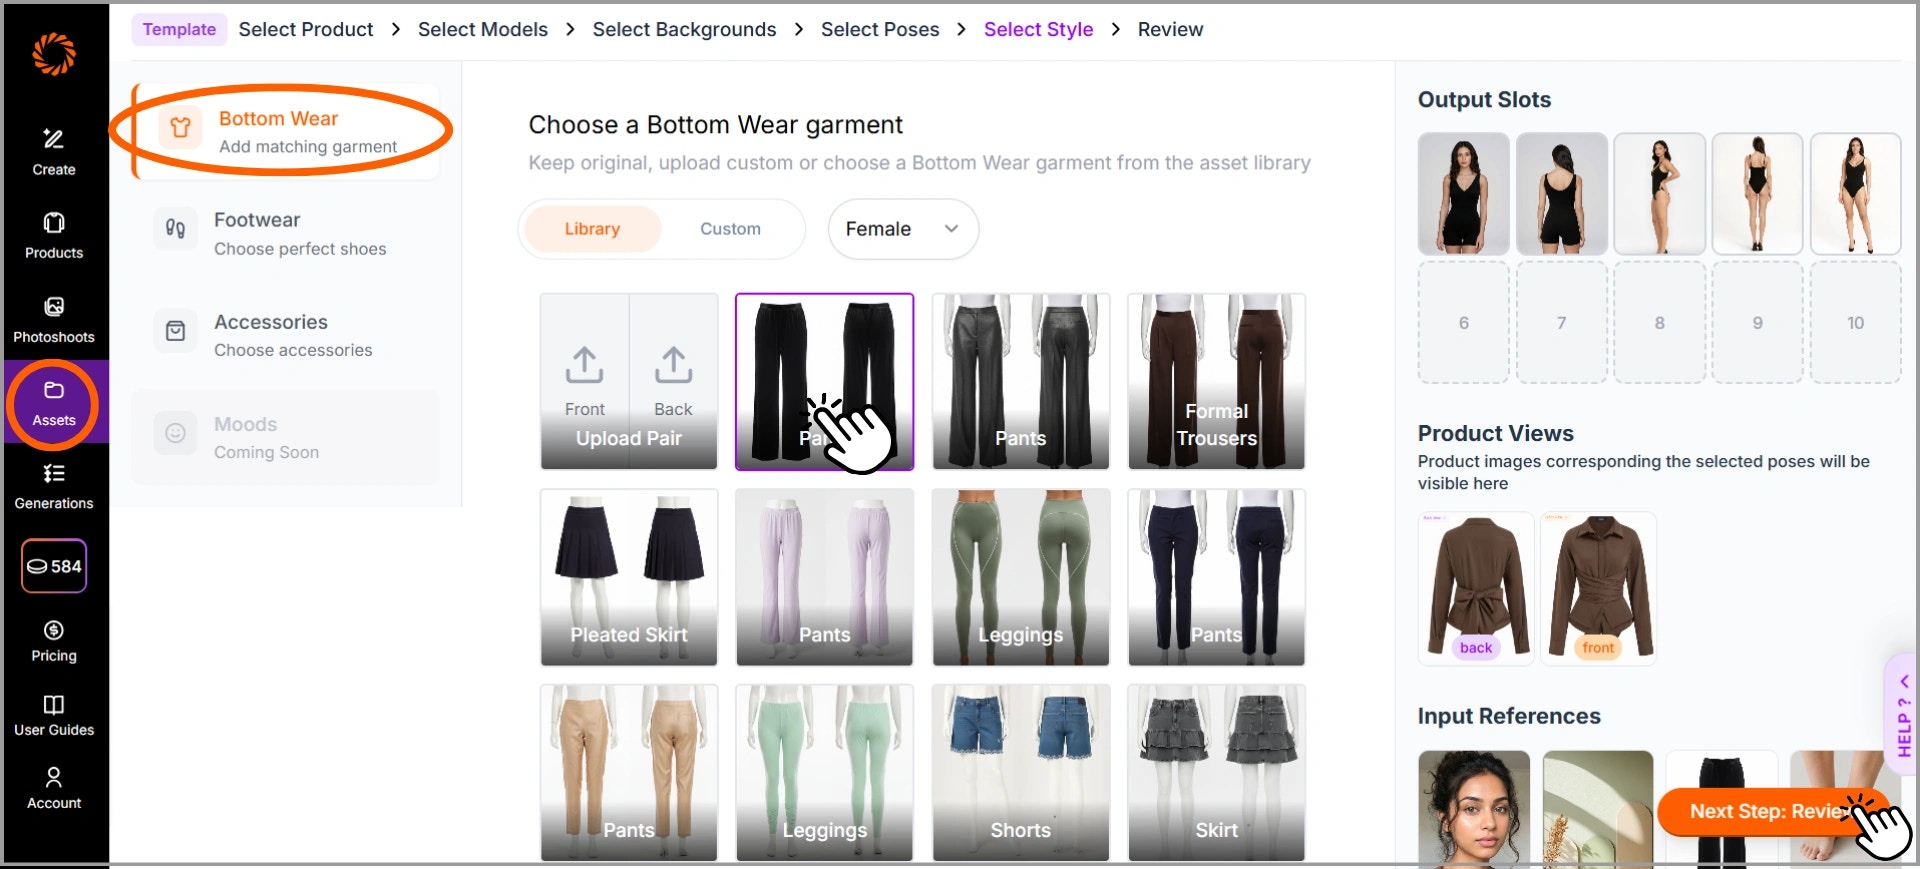
* **Bottom Wear:** Keep the original garment, upload a custom pair (front & back), or choose from the available library options. This feature is available only when you select **top wear.**
Once you have finalized your selection, click on **Select Style** to continue.
## Step 3: Select Style
Enhance your look by adding matching items such as **Accessories, Footwear, and Bottom Wear**.
* **Bottom Wear:** Keep the original garment, upload a custom pair (front & back), or choose from the available library options. This feature is available only when you select **top wear.**
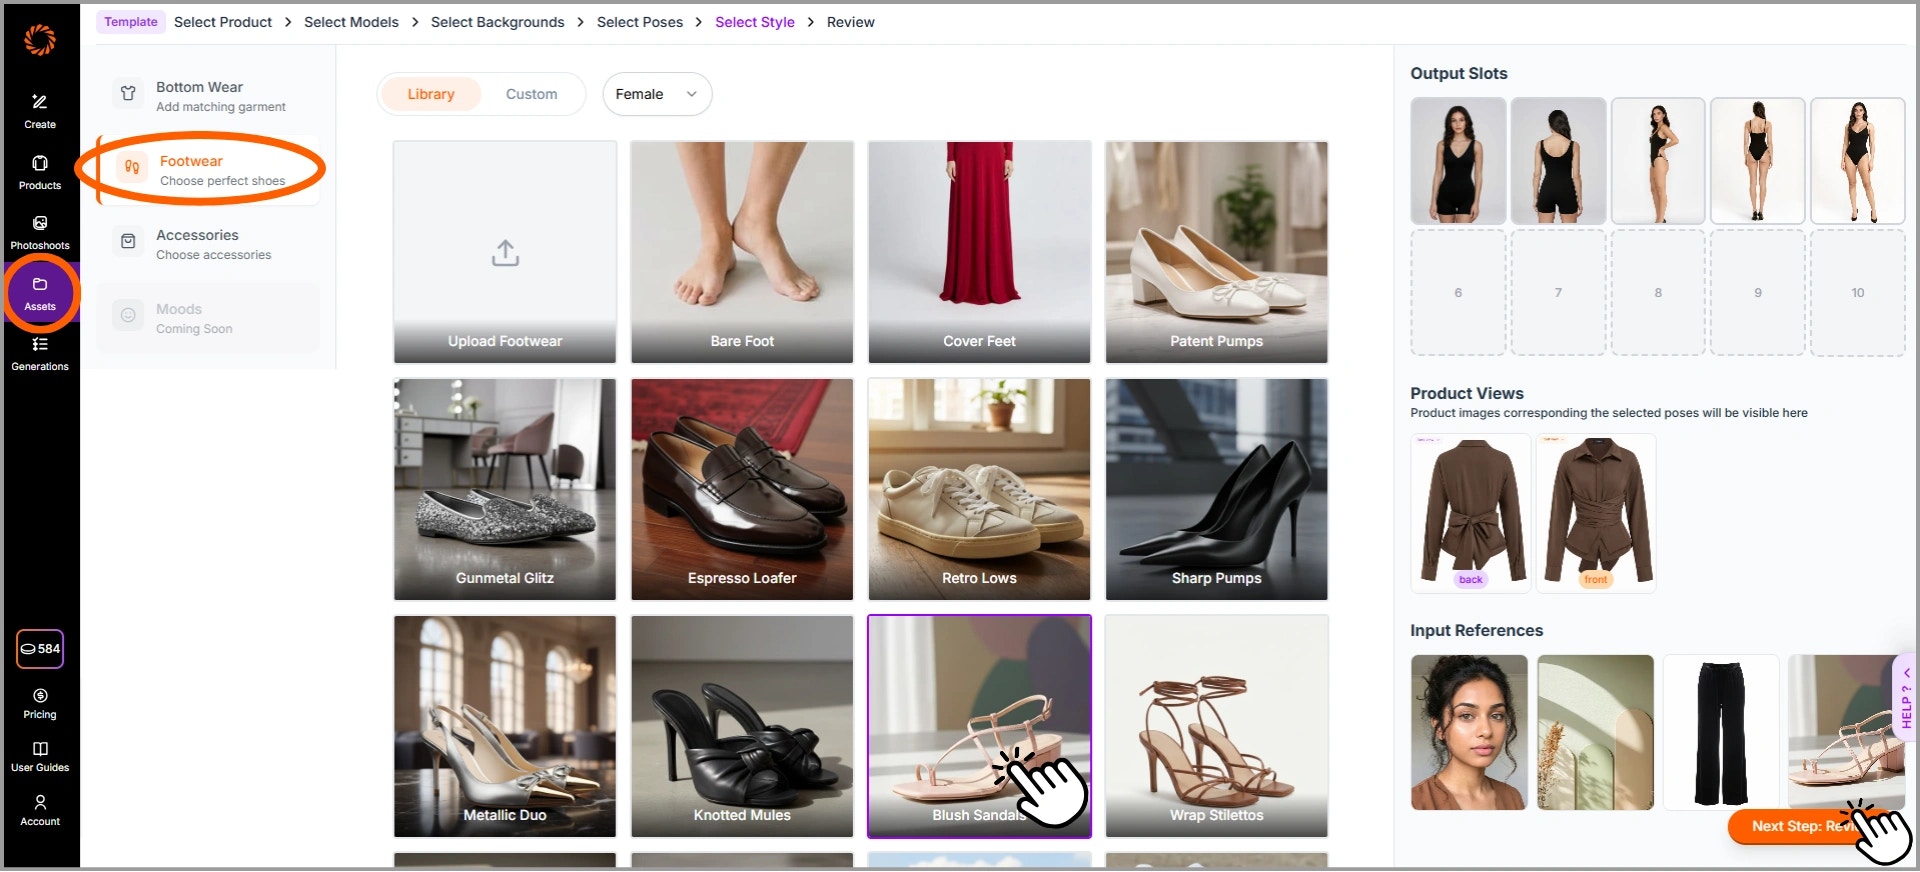
 * **Footwear:** Select shoes from the library or upload custom footwear to match your style.
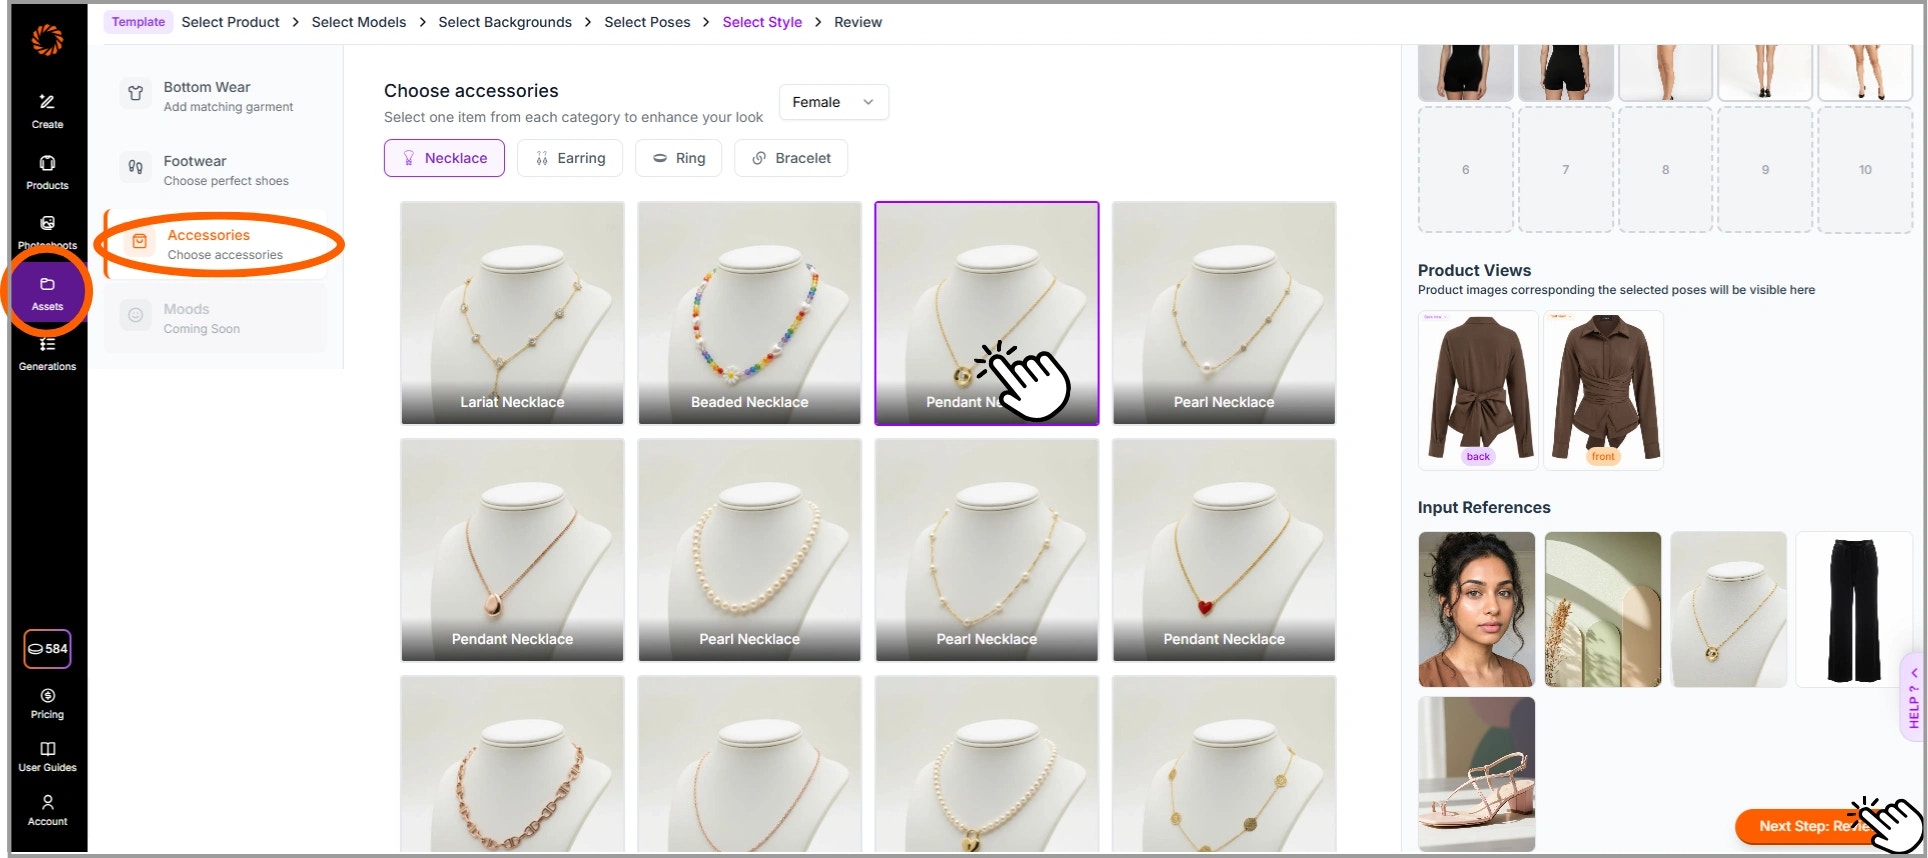
 * **Accessories:** Choose from categories like Necklace, Earrings, Ring, or Bracelet to complement the outfit.
 You can switch between **Library** and **Custom** (where available) to upload your own assets.
Selected items will appear in the **Input References** section on the right.
Once you have finalized your selections, click **Next Step: Review** to continue.
## Step 4: Review & Name Your Template
Review all your selected details, including **Model, Background, Poses, and Styles**, to ensure everything looks correct. You can also make changes if needed by clicking the **edit icon** next to each section.
Once you're satisfied, click **Create Template**, enter a suitable name for the product category so it's easy to find later, and then click **Create Template** again to proceed.
You can switch between **Library** and **Custom** (where available) to upload your own assets.
Selected items will appear in the **Input References** section on the right.
Once you have finalized your selections, click **Next Step: Review** to continue.
## Step 4: Review & Name Your Template
Review all your selected details, including **Model, Background, Poses, and Styles**, to ensure everything looks correct. You can also make changes if needed by clicking the **edit icon** next to each section.
Once you're satisfied, click **Create Template**, enter a suitable name for the product category so it's easy to find later, and then click **Create Template** again to proceed.
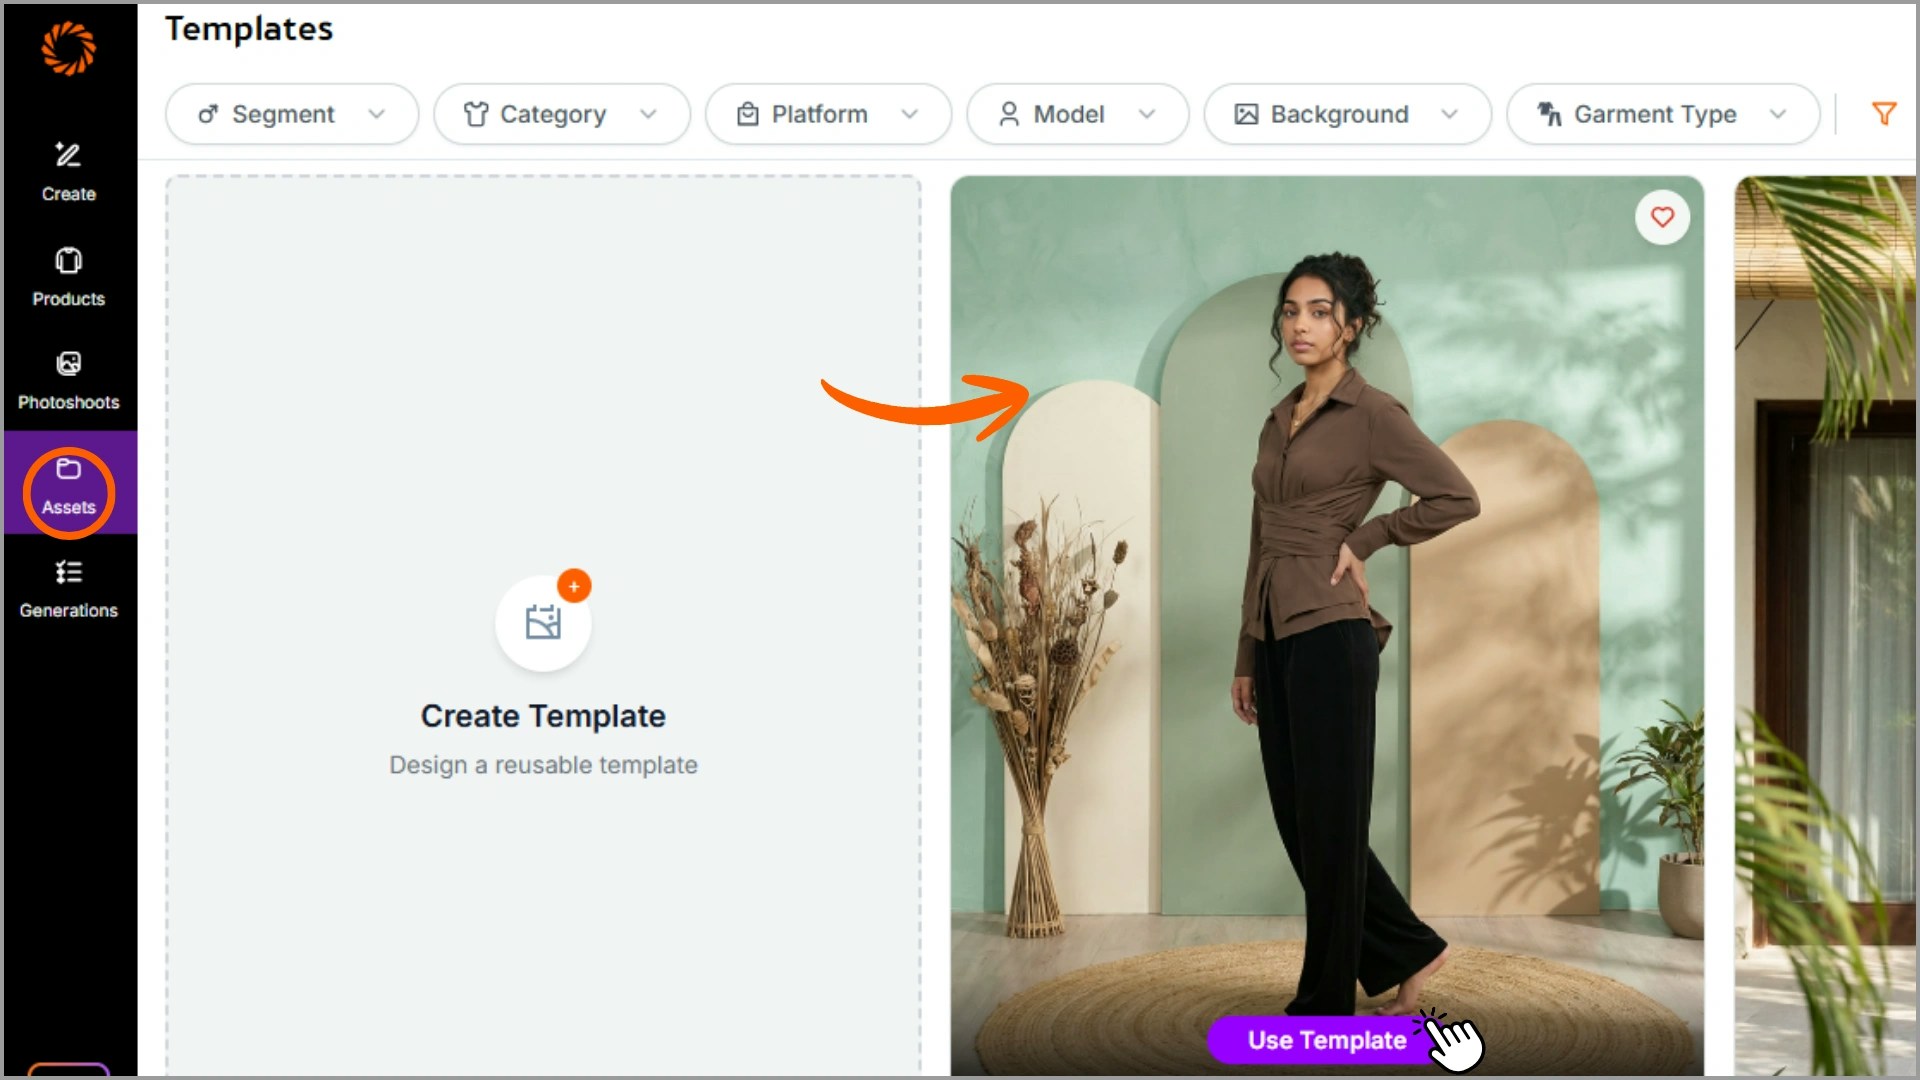
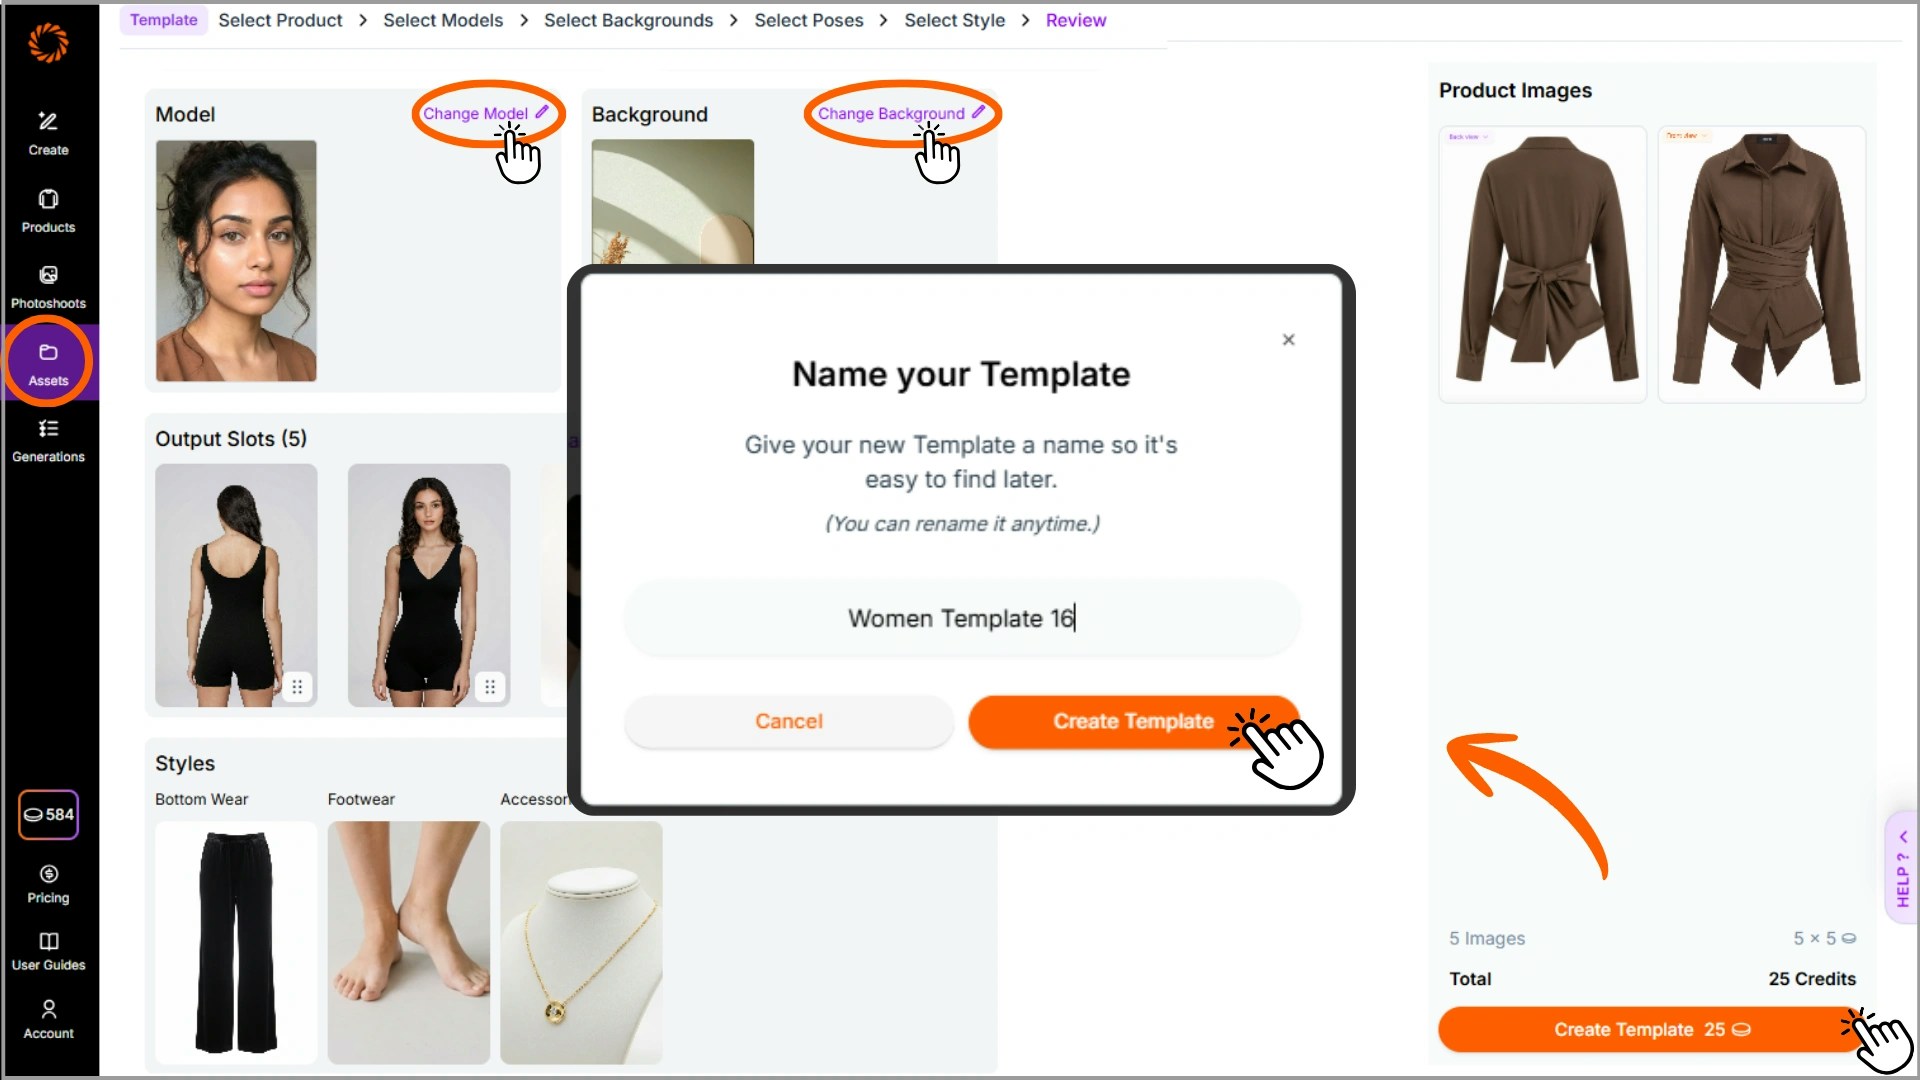 Your reusable template is now ready! You can use it anytime from the **Asset** section to quickly create consistent product photoshoots.
 Happy Creation! If you have any specific demands in a template, feel free to contact [sales@getayna.com](mailto:sales@getayna.com), and we will walk you through it!