What are Templates?
Templates are pre-defined photoshoot setups that help you create consistent visuals at scale. You can choose from our library of 150+ pre-saved templates or create your own Custom Templates for different garment categories, each with a fixed combination of models, poses, backgrounds, and styling.Benefits of Custom Templates
- Saves time: Avoid selecting models, poses, and backdrops manually for every garment.
- Ensures consistency: Maintain the same visual identity across SKUs.
- Brand-specific output: Create unique looks aligned with your brand language.
- Flexible editing: Modify template elements anytime as your needs evolve.
Credit Consumption of Templates
Templates do not have a fixed cost, Credits are consumed based on the number of poses added:- 1 pose = 5 credits, so if you wish to create 4 poses in a template = 20 credits. There is no limit to the number of poses in a template.
Step 1: Select Your Product
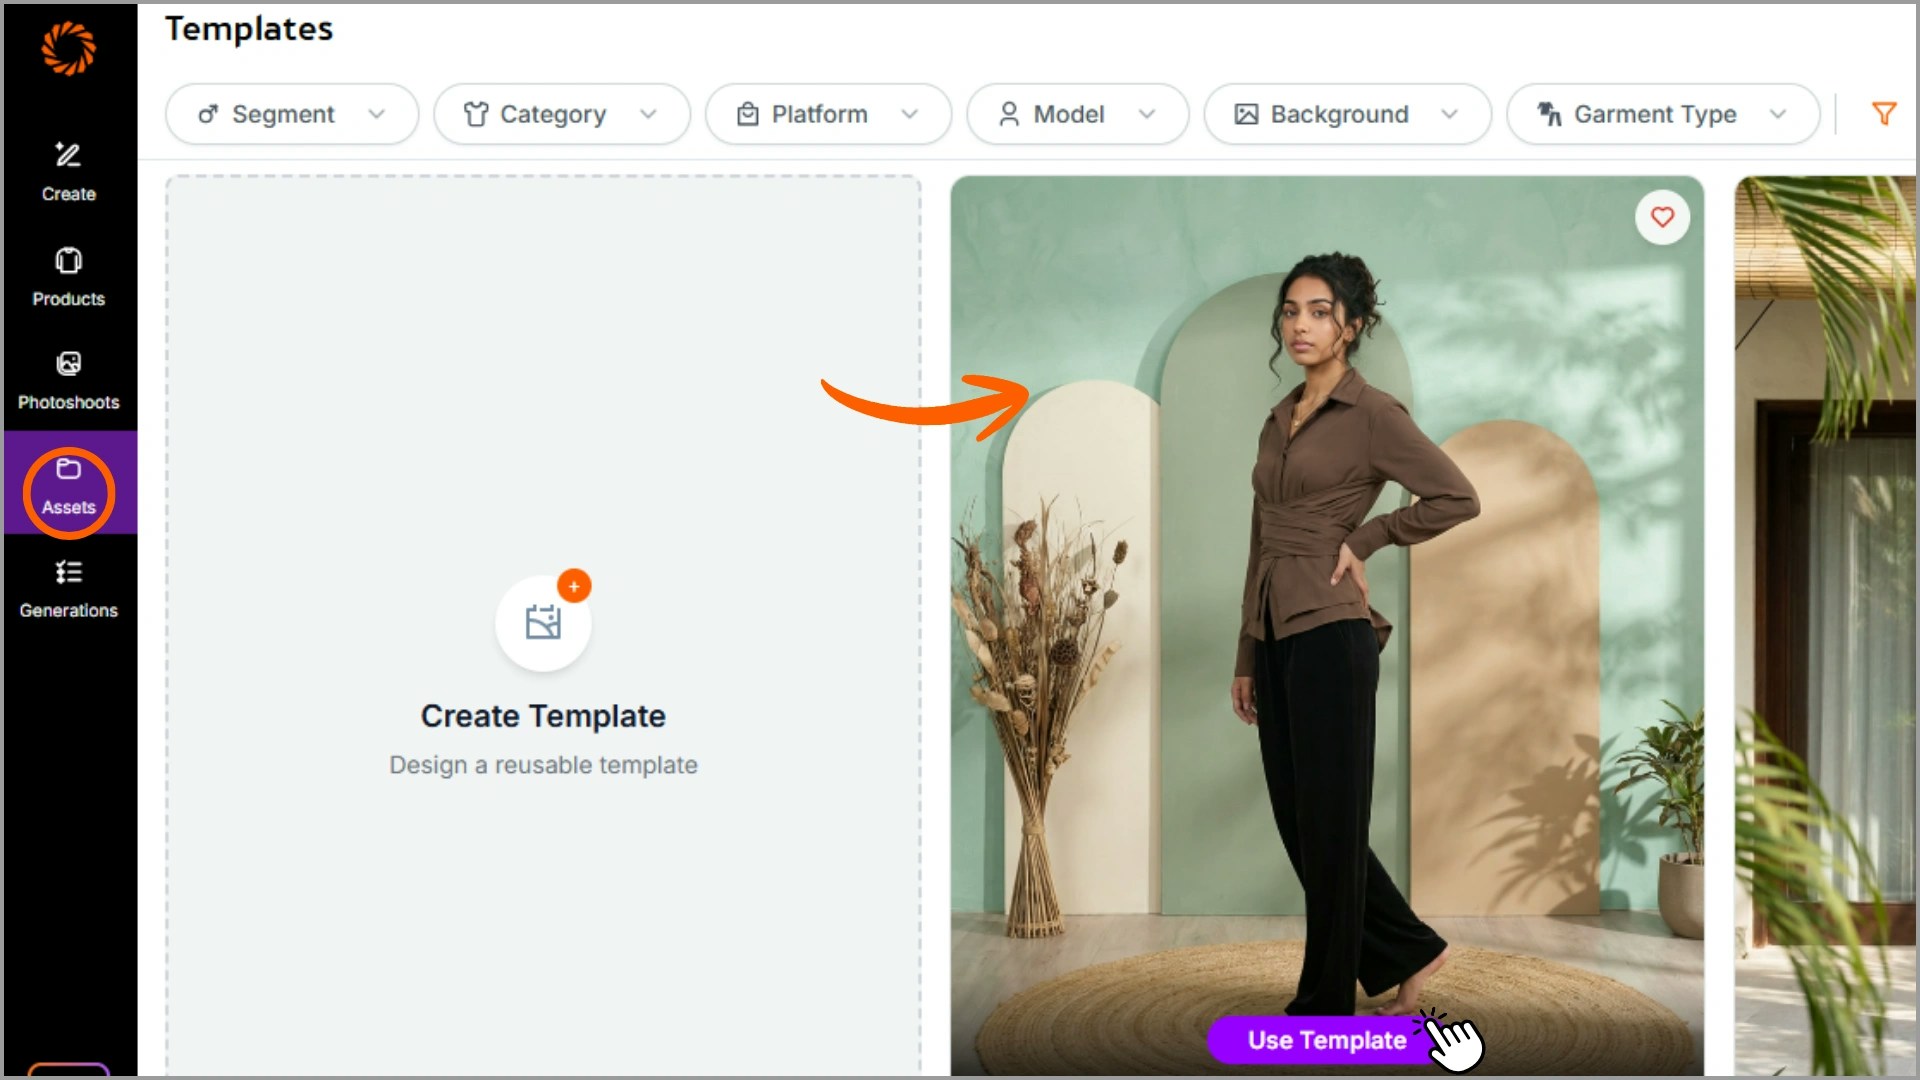
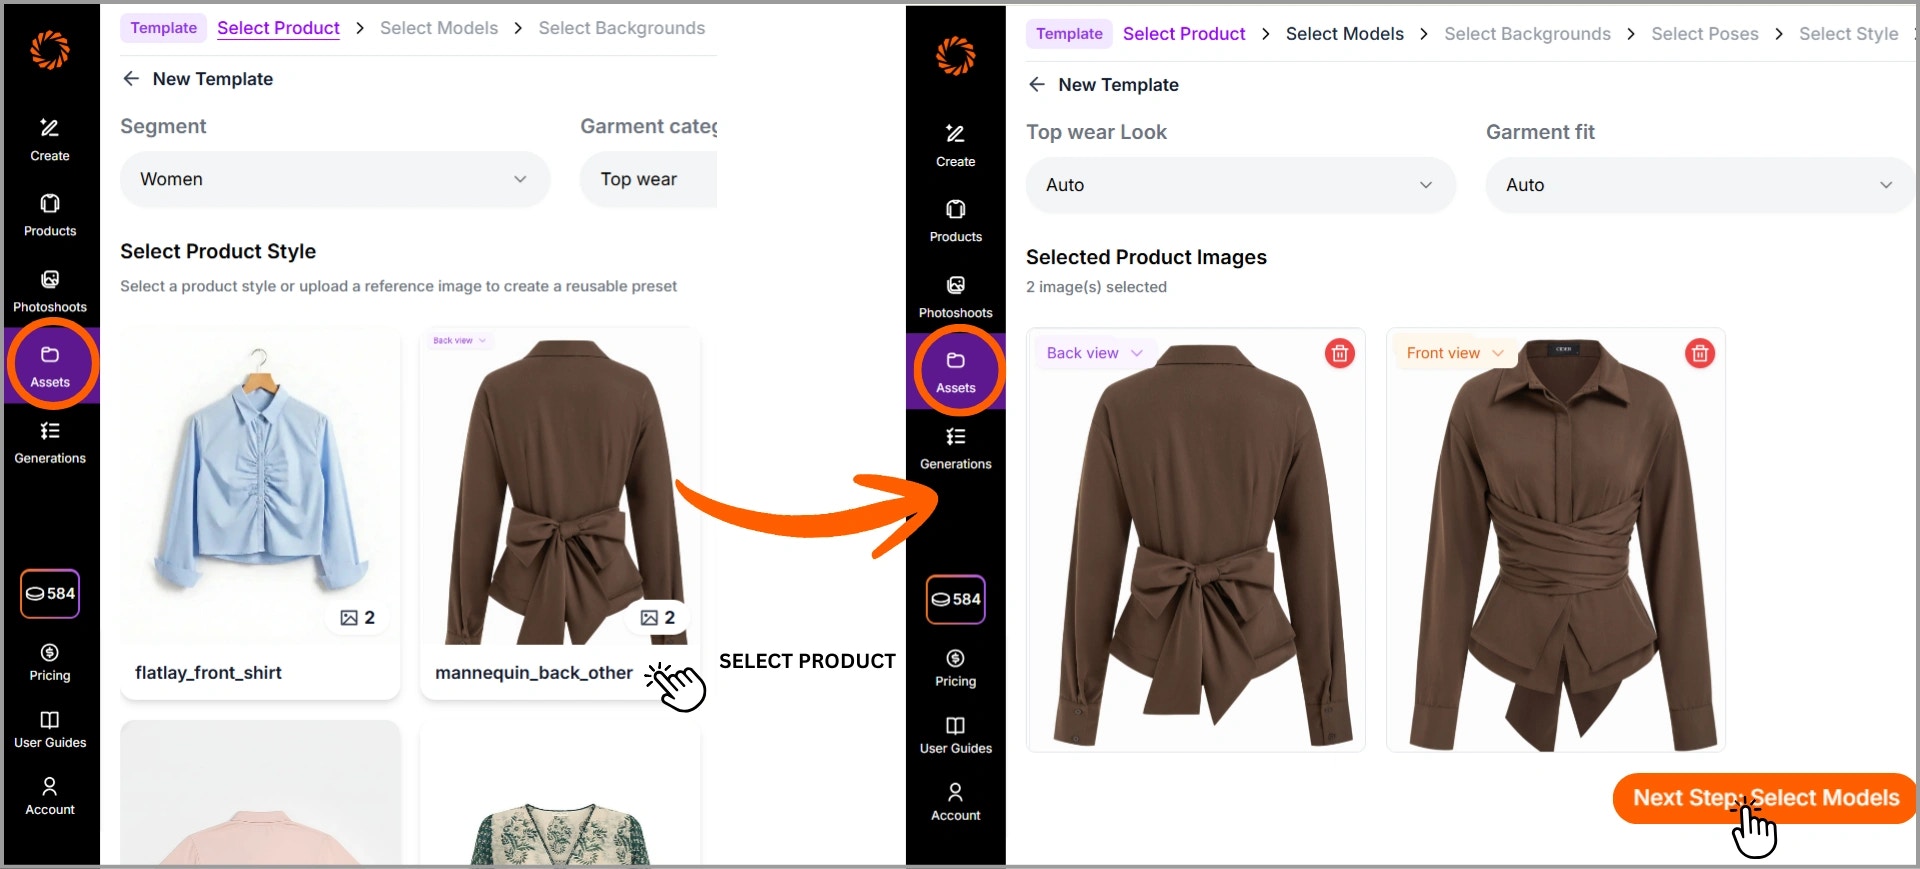
Go to the Assets section and select Templates. Click on Create Template, select the segment and garment category (e.g., Women – Top Wear), select your product from the library or upload product images (front/back views).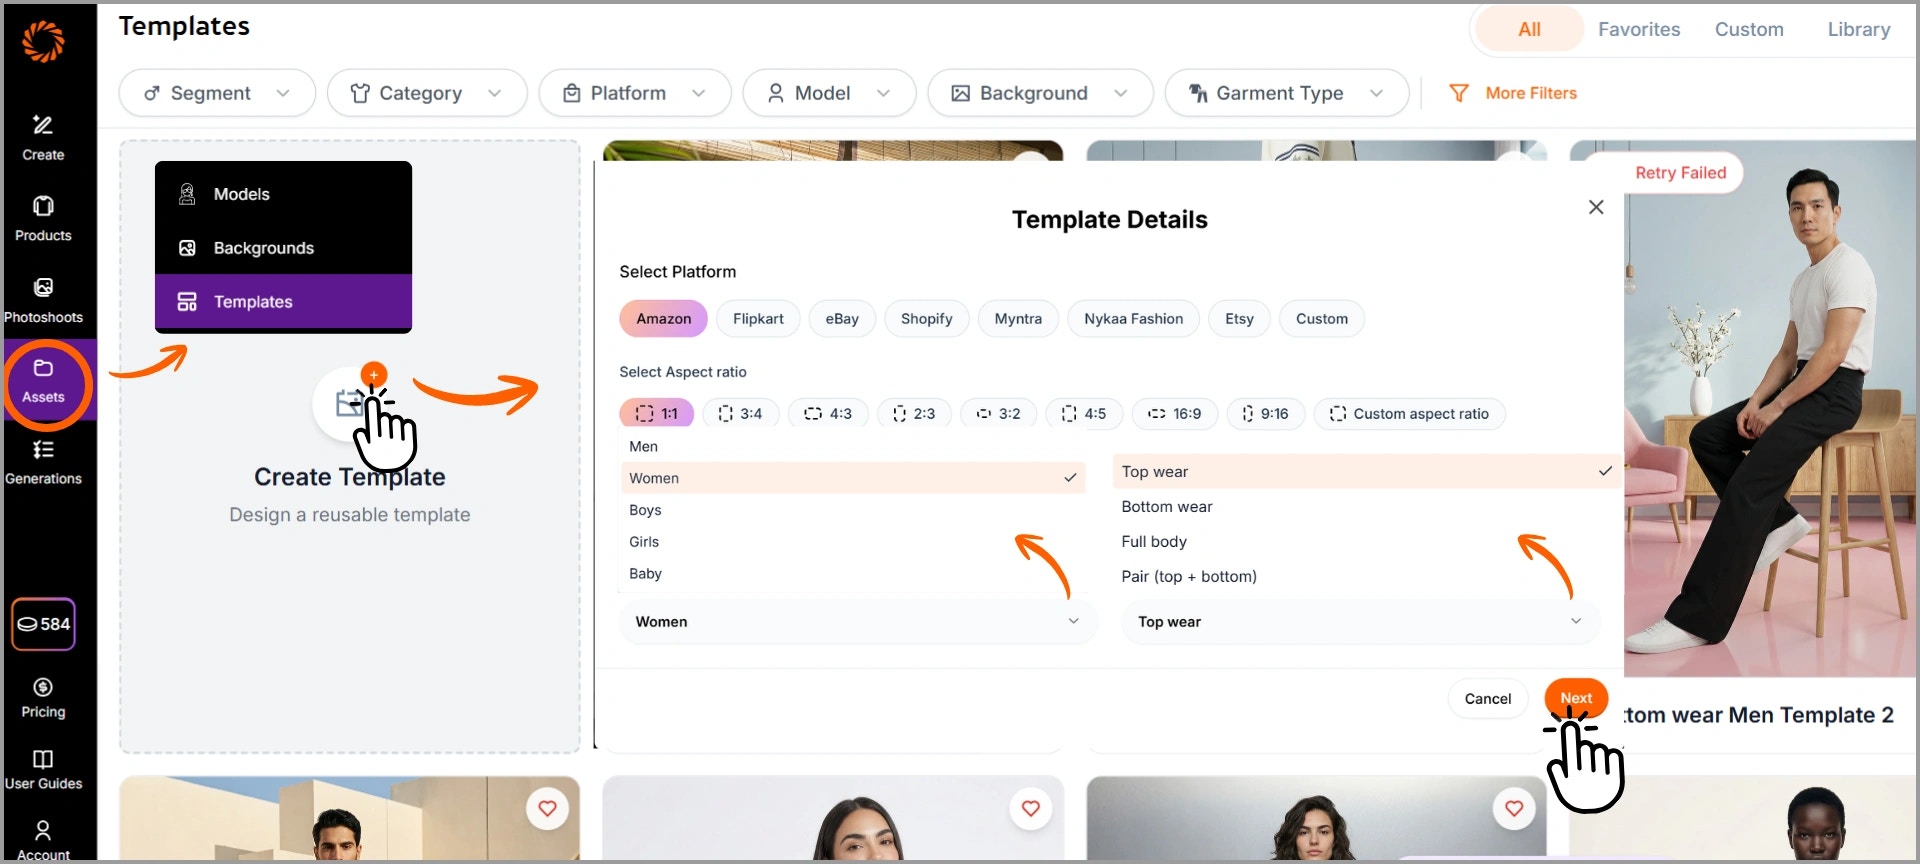
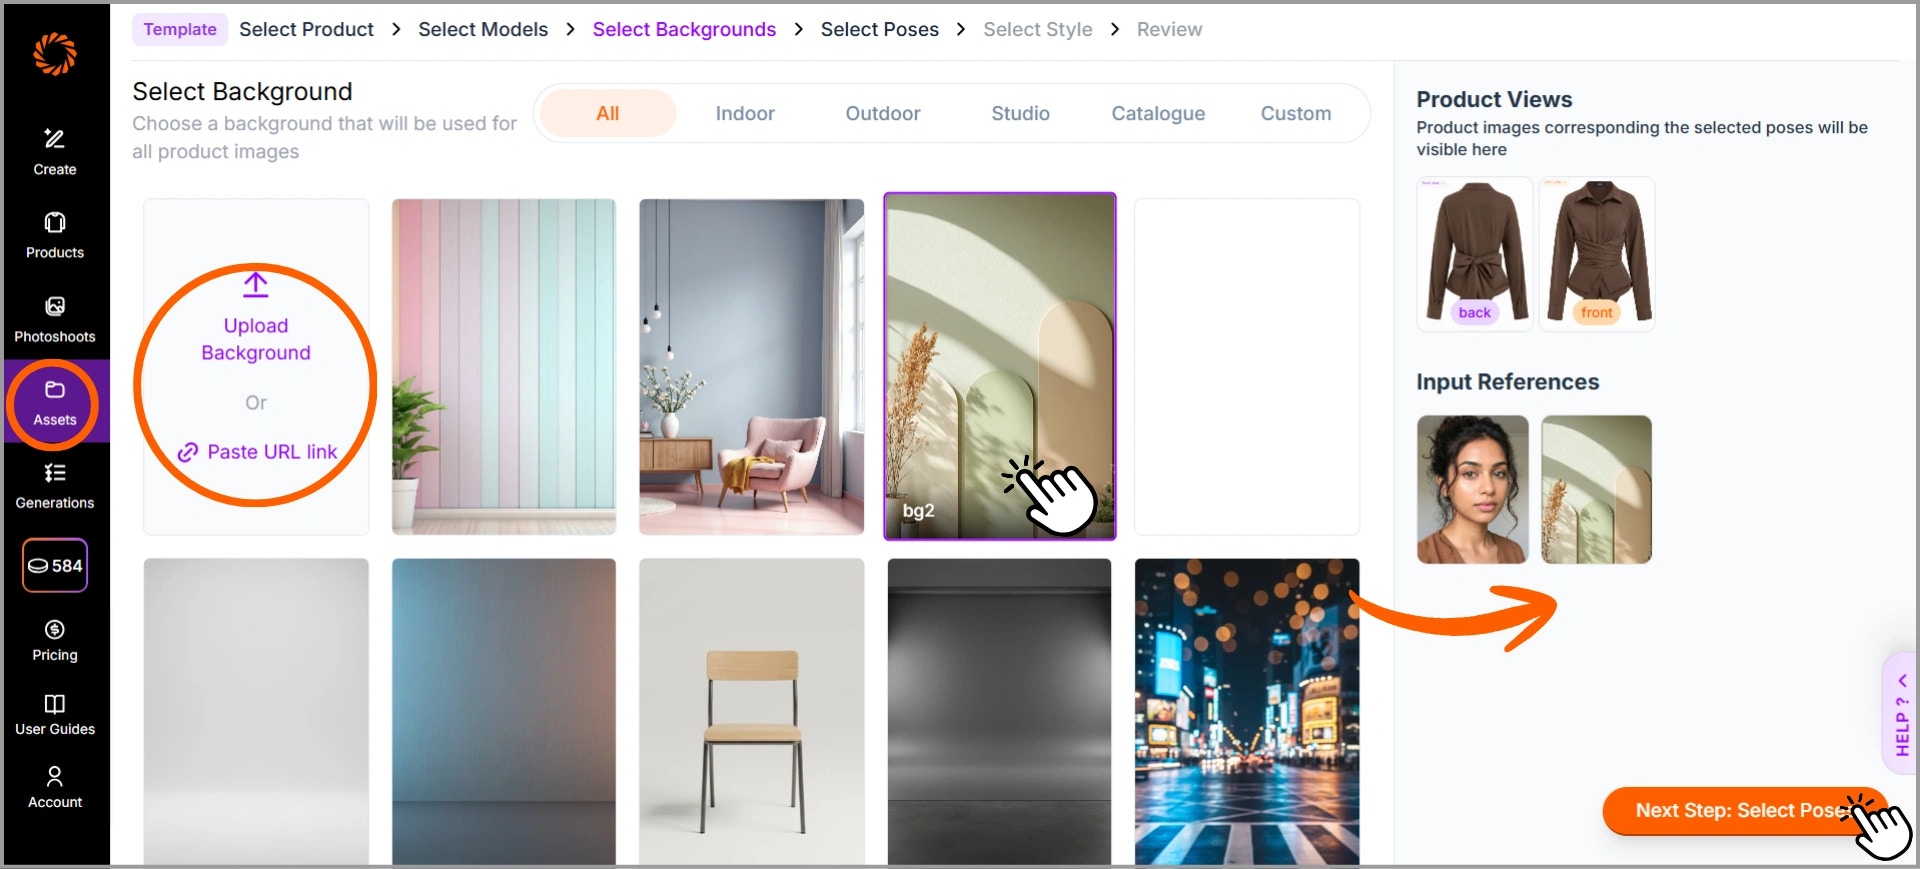
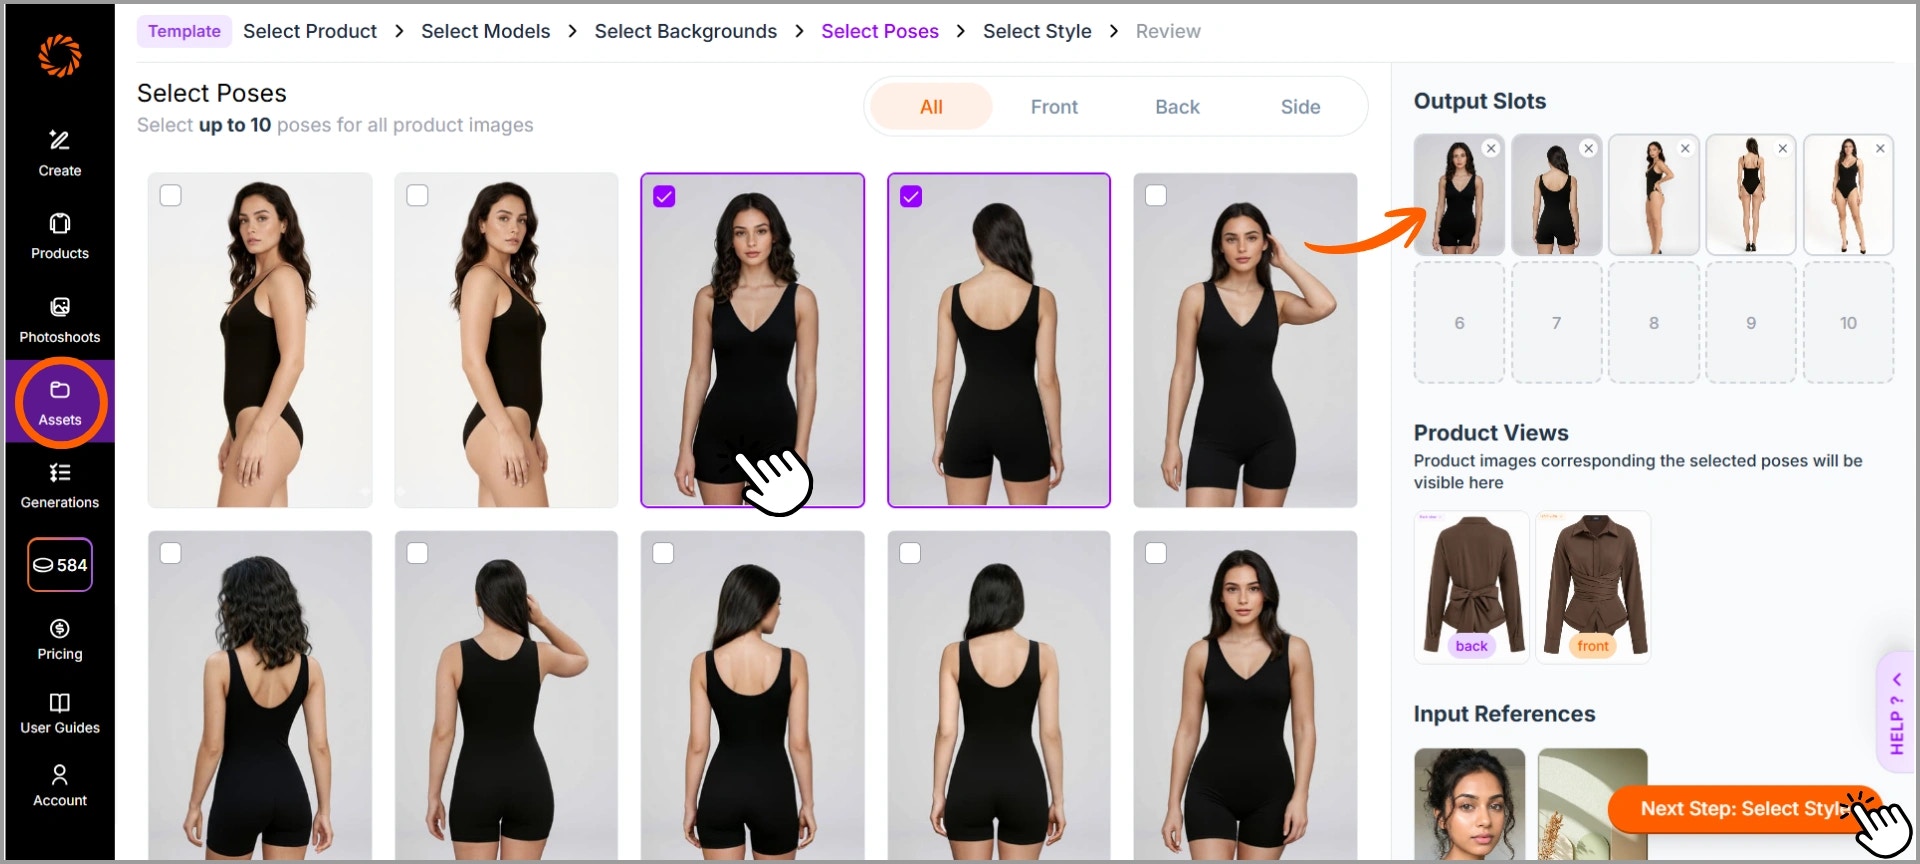
Step 2: Select Model, Background and Poses
A) Choose Model - Filter by Gender, Age, Ethnicity, Body Type, or Hair Type and select the best fit. The model will appear in Input References.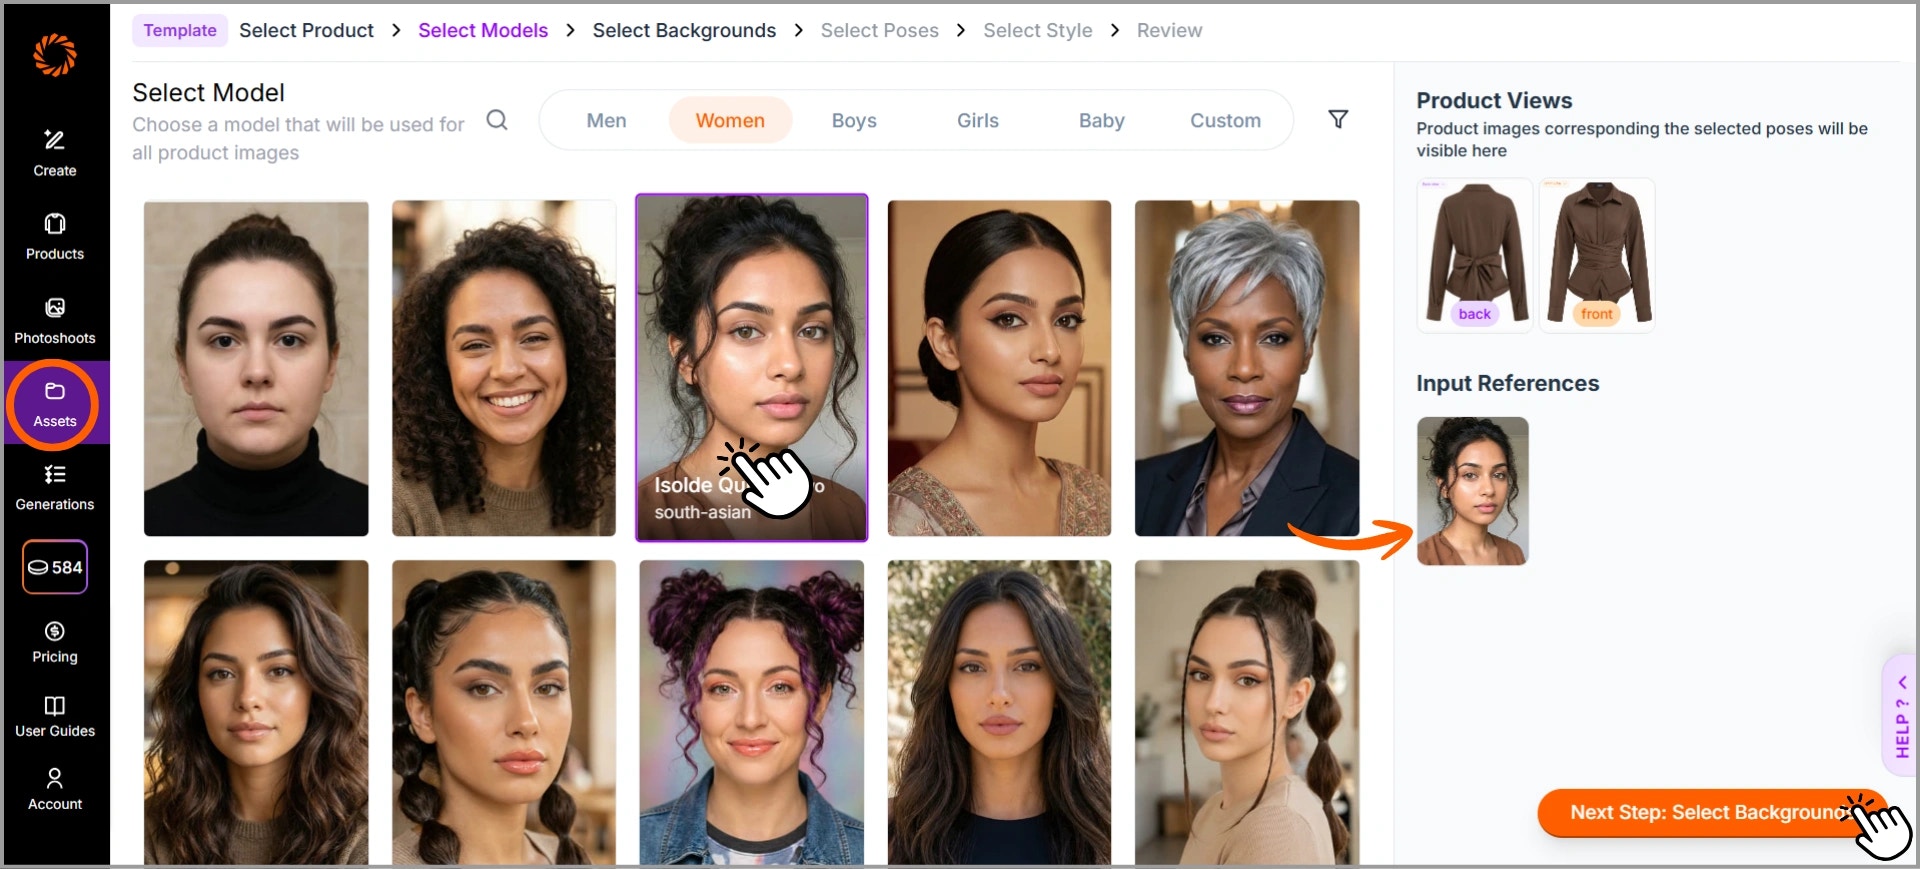
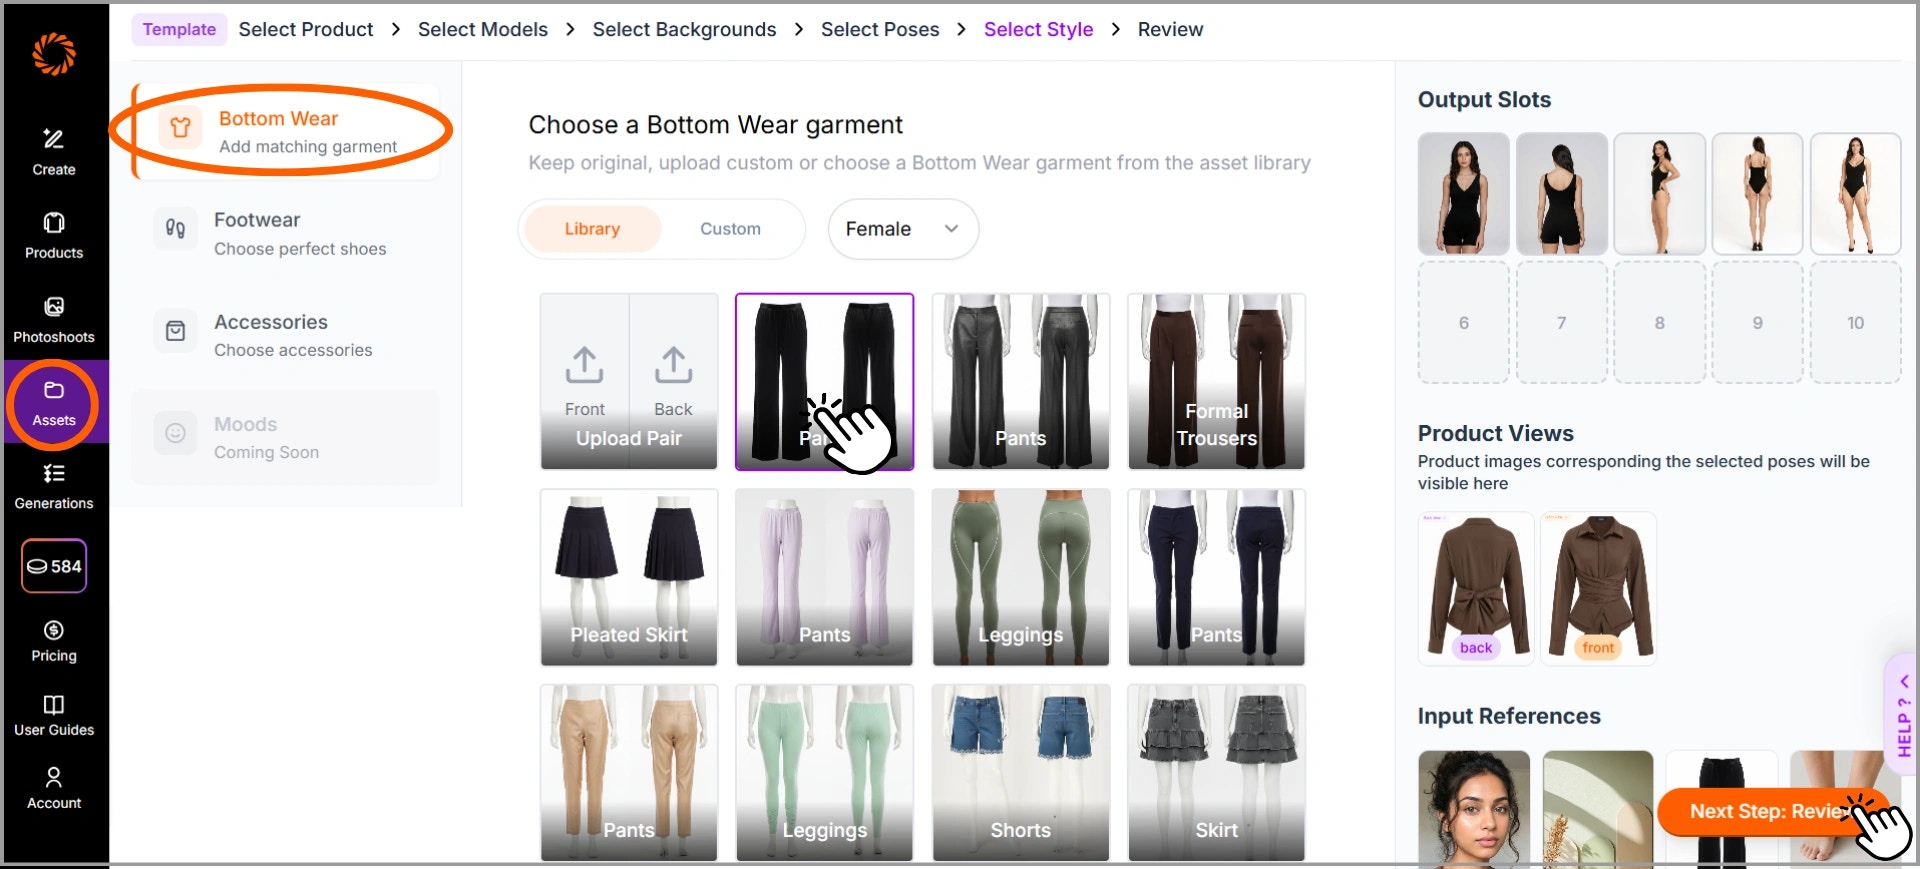
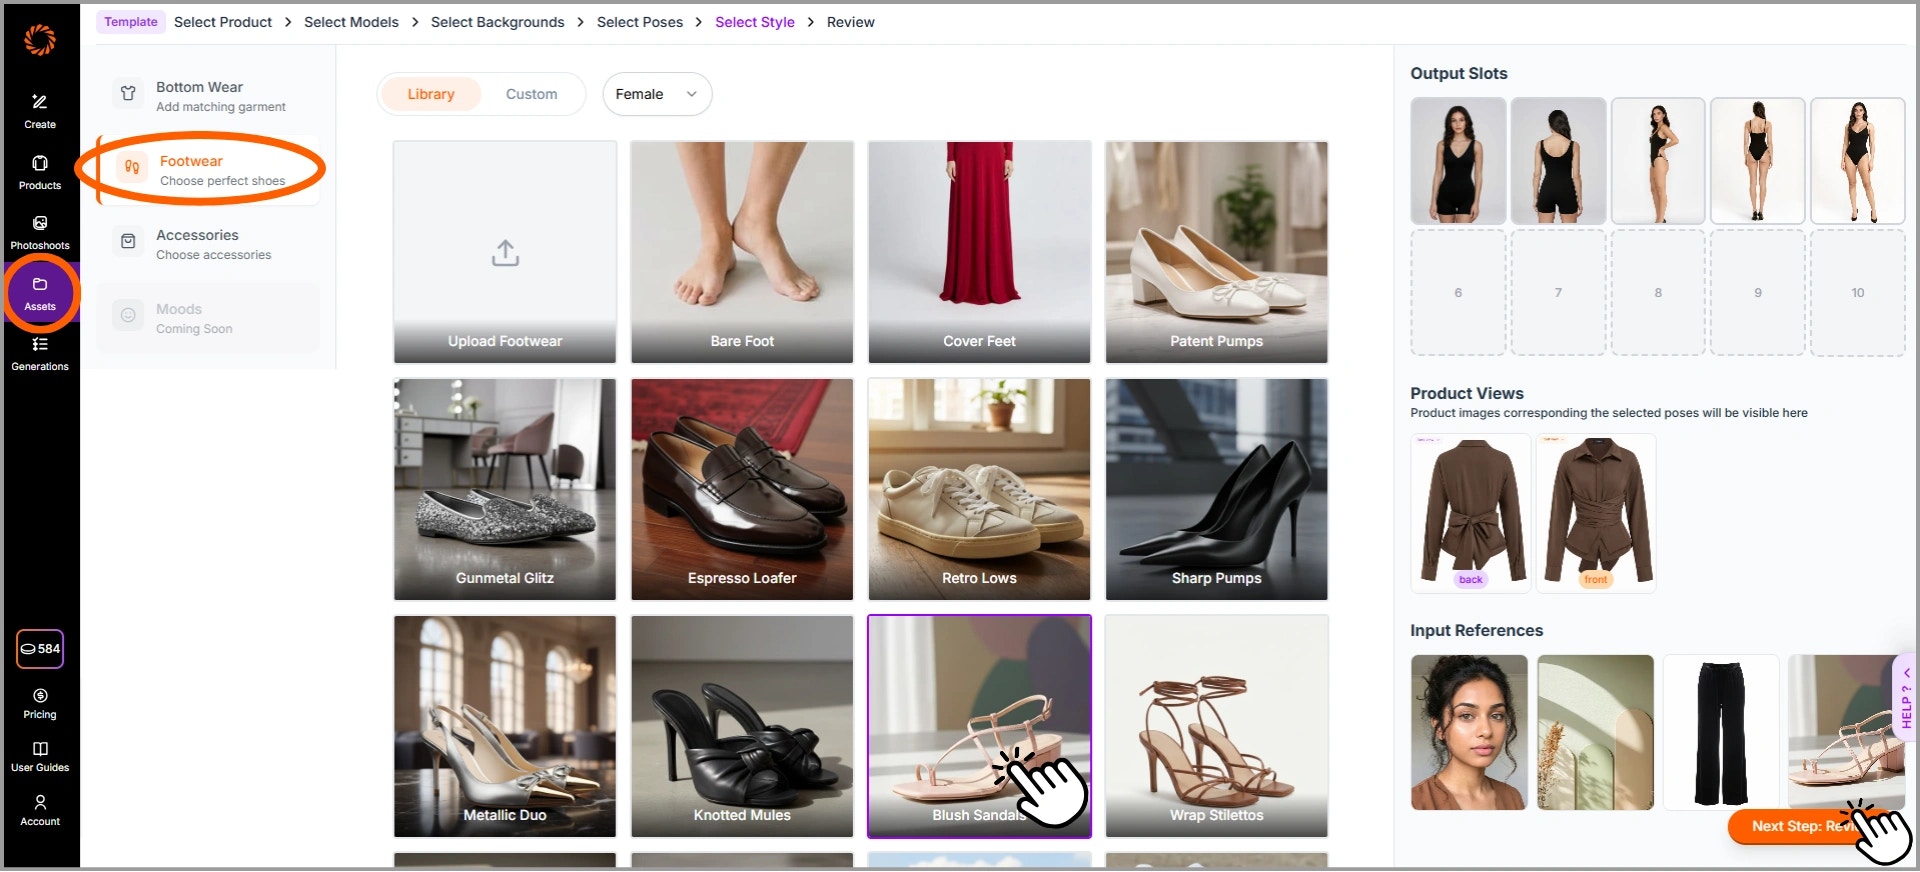
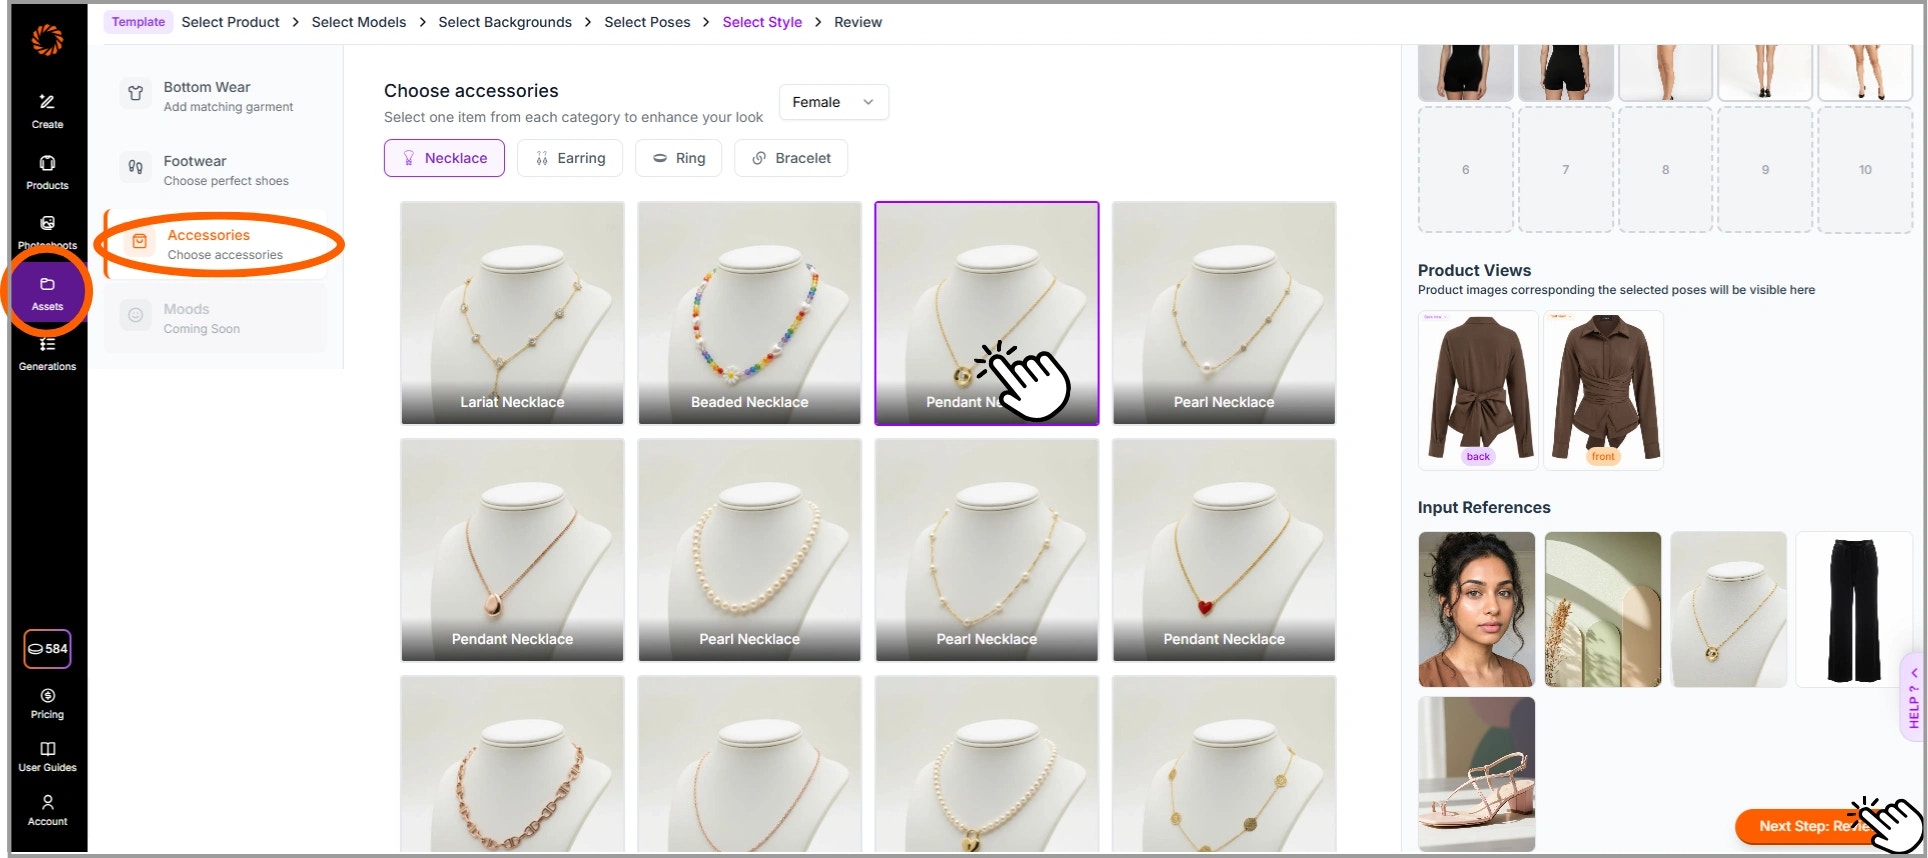
Step 3: Select Style
Enhance your look by adding matching items such as Accessories, Footwear, and Bottom Wear.- Bottom Wear: Keep the original garment, upload a custom pair (front & back), or choose from the available library options. This feature is available only when you select top wear.
- Footwear: Select shoes from the library or upload custom footwear to match your style.
- Accessories: Choose from categories like Necklace, Earrings, Ring, or Bracelet to complement the outfit.
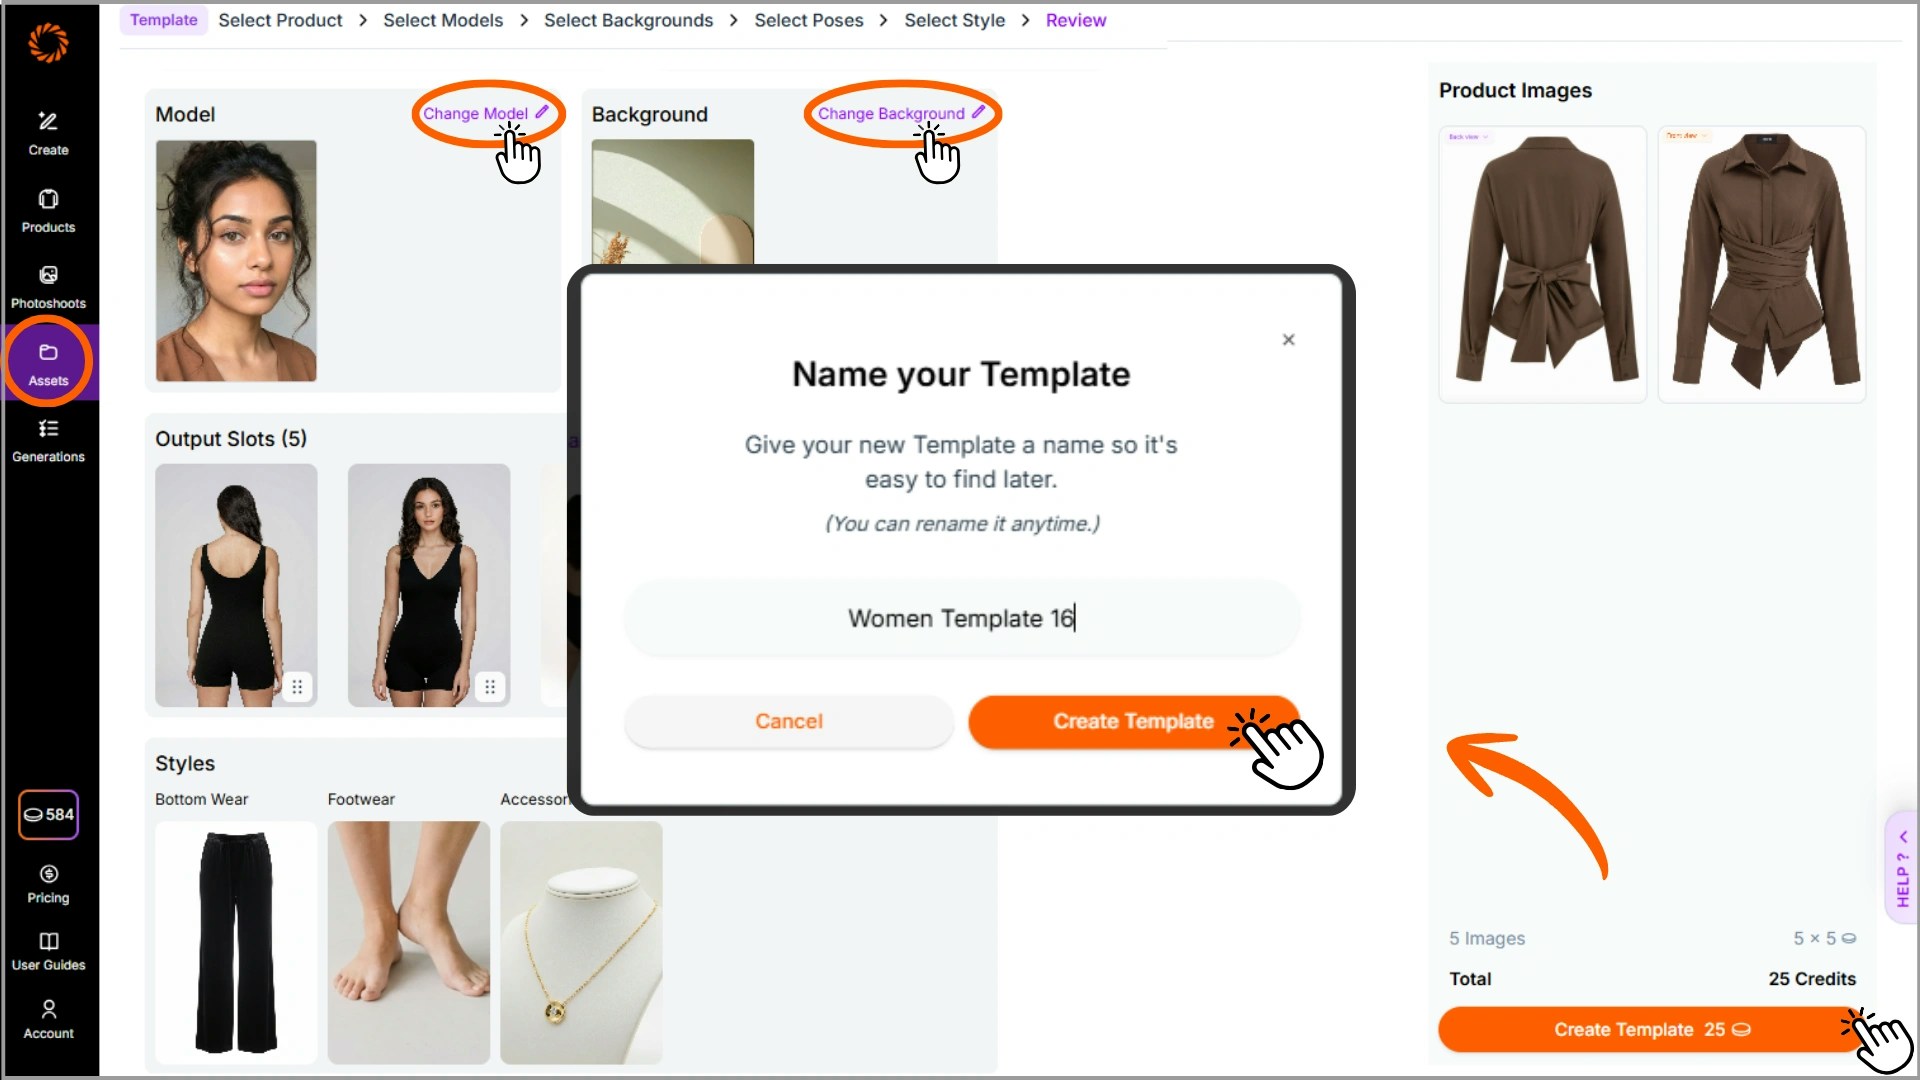
Step 4: Review & Name Your Template
Review all your selected details, including Model, Background, Poses, and Styles, to ensure everything looks correct. You can also make changes if needed by clicking the edit icon next to each section. Once you’re satisfied, click Create Template, enter a suitable name for the product category so it’s easy to find later, and then click Create Template again to proceed.