Before you start
- Infographics can be added to finished images. Images that are still being generated or edited can be used once they’re done.
- You need a plan that includes infographics (Silver, Gold, Platinum or Enterprise), and the Admin, Member or QC Reviewer role.
Step 1: Choose your images
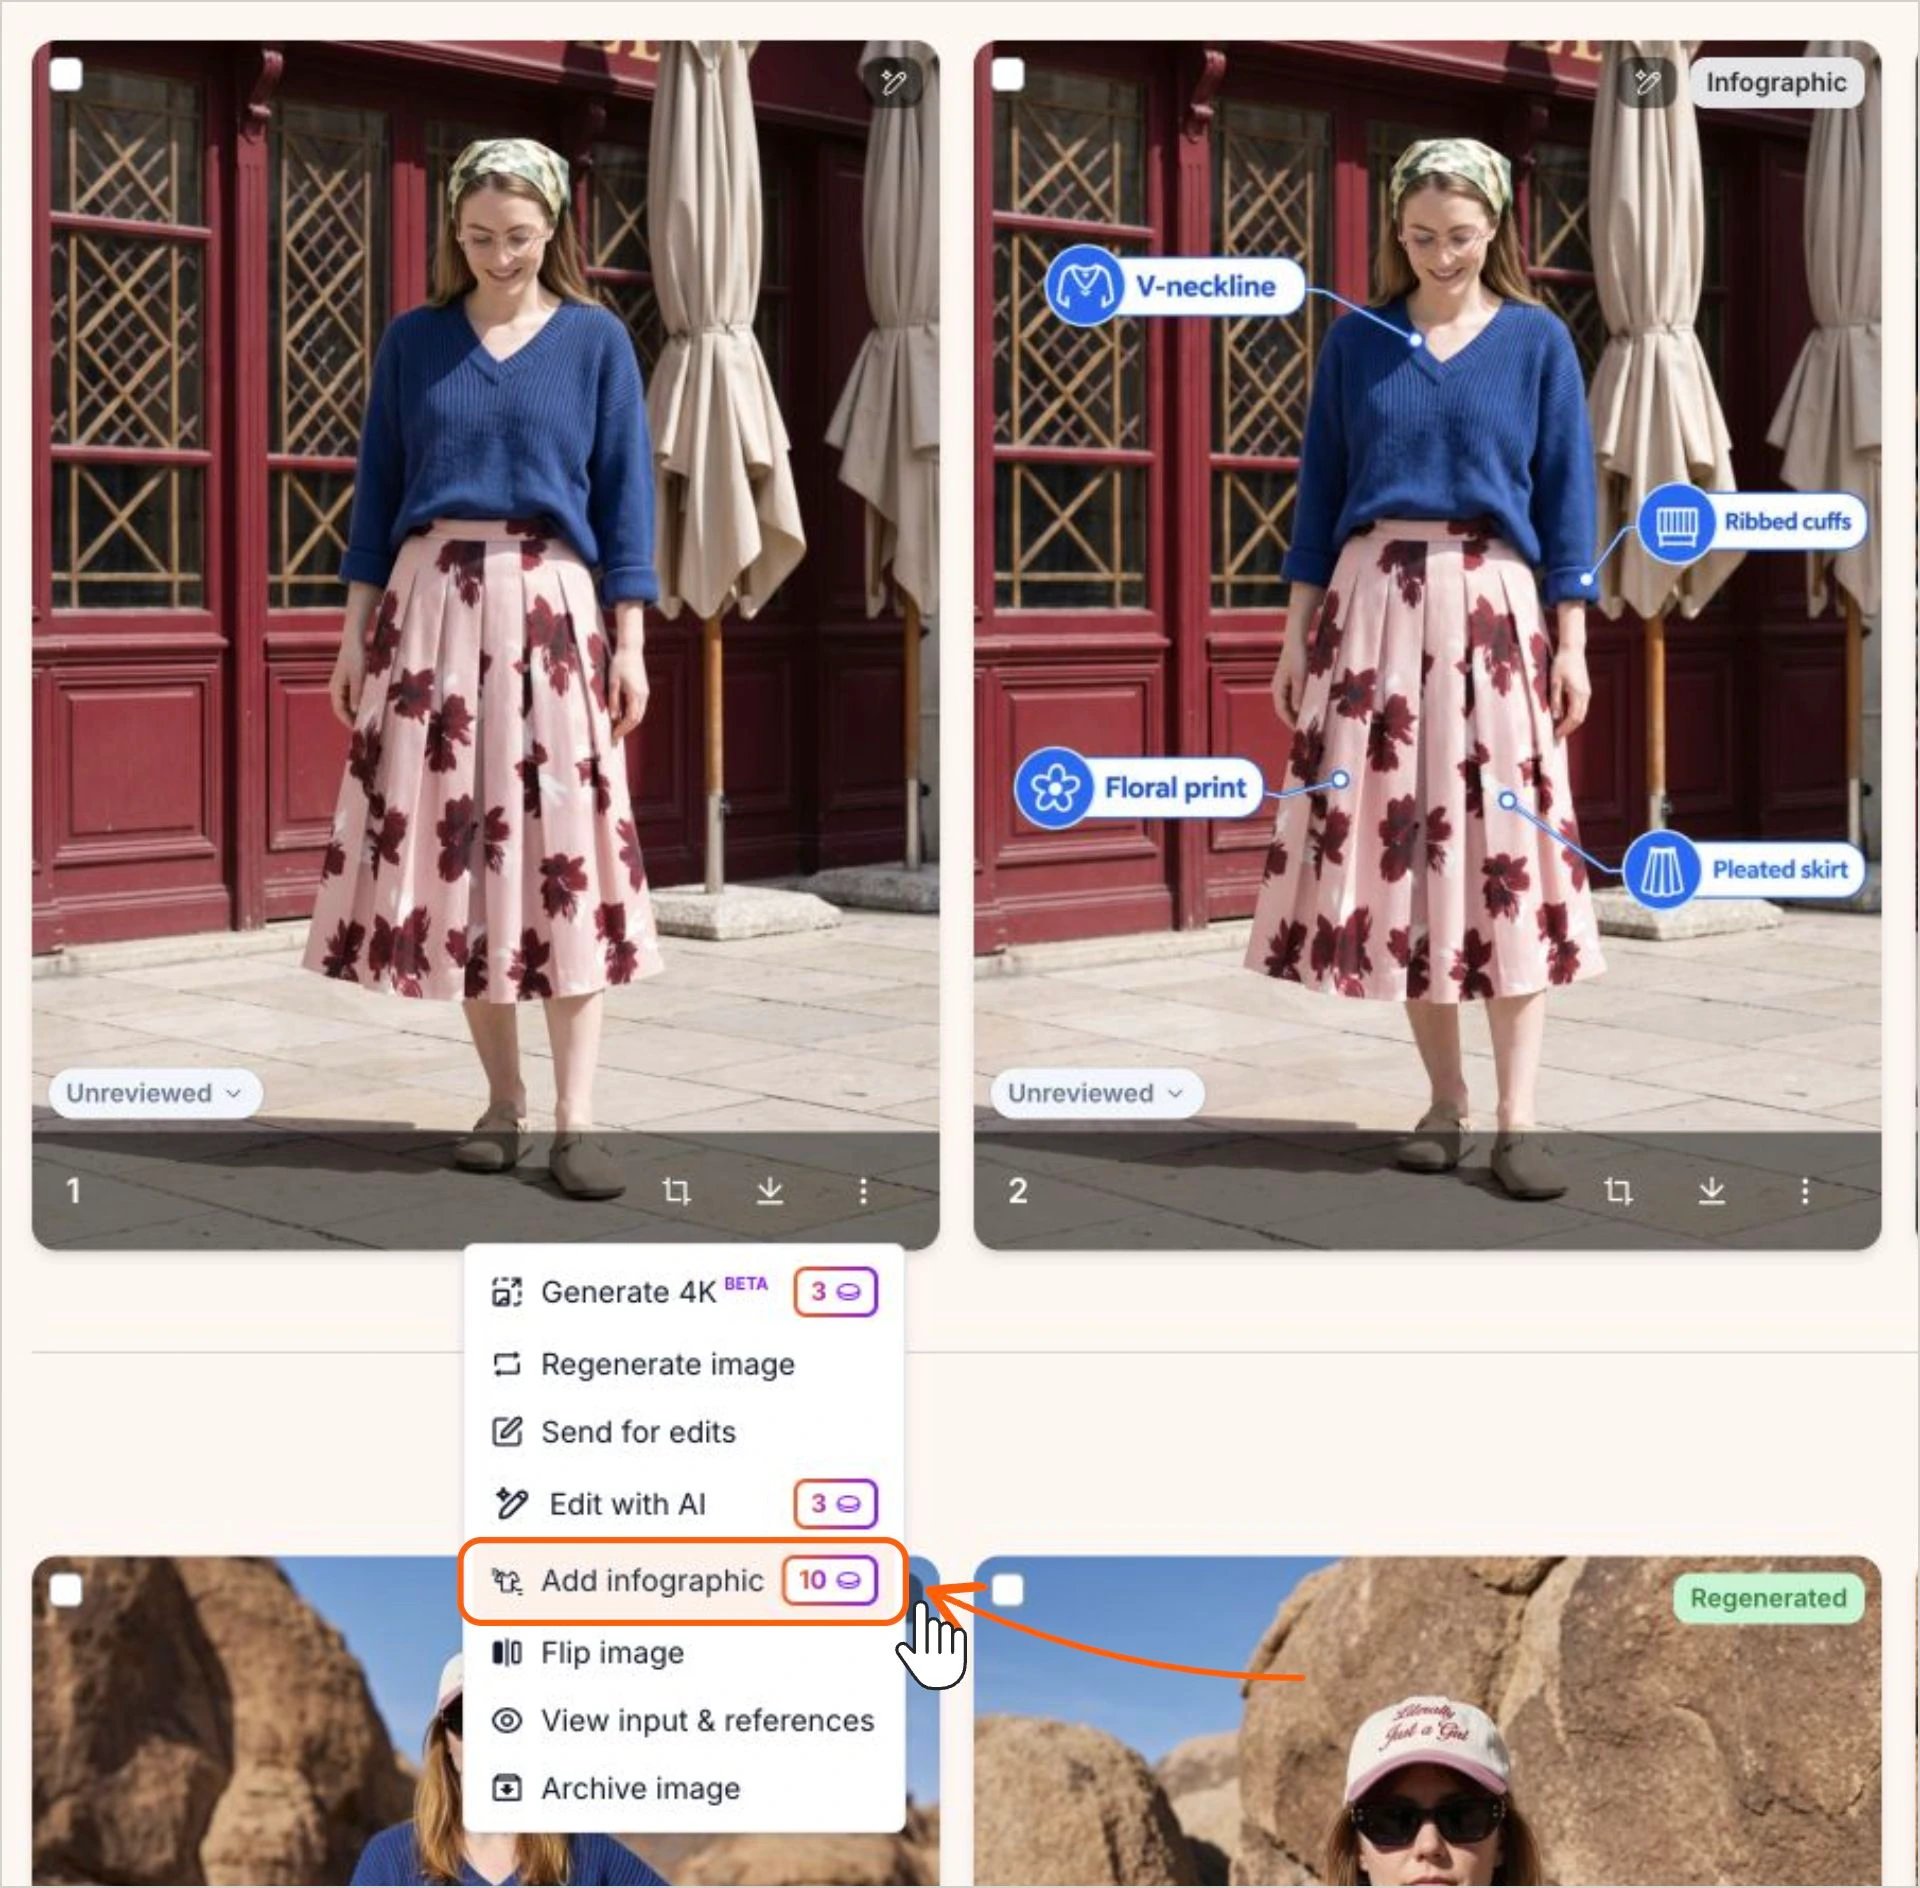
You can start from one image, or from several images of the same product:- One image: Click the ⋮ menu on the image and choose Add infographic. The menu shows how many credits one infographic costs on your plan.
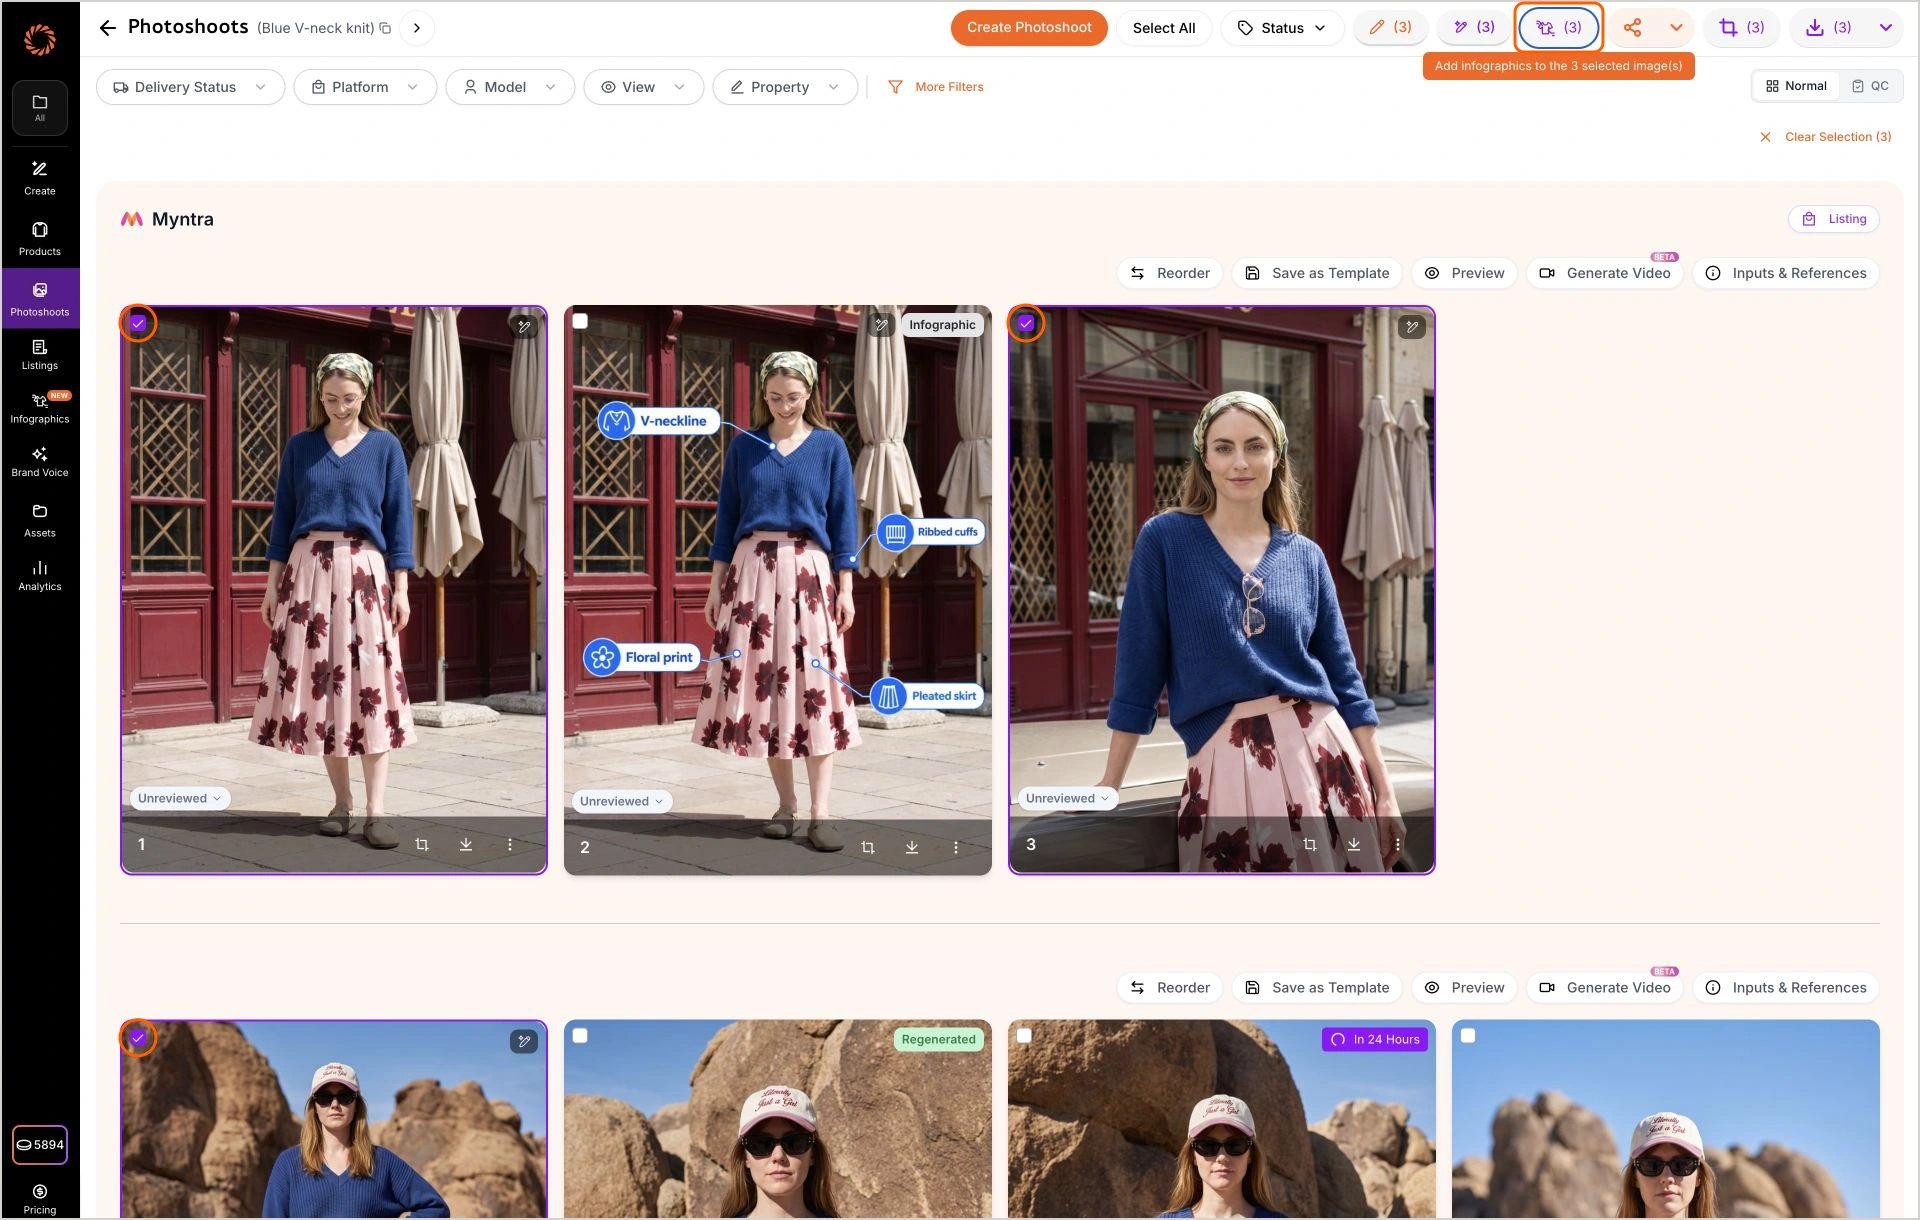
- Several images: Open the product’s page, tick the images you want (up to 10 at a time), then click the infographics icon in the top bar. On a computer, it shows how many images you’ve selected.
- An archived image: Archived images don’t have a ⋮ menu, so click the infographics icon on the image instead.
Step 2: Choose a template
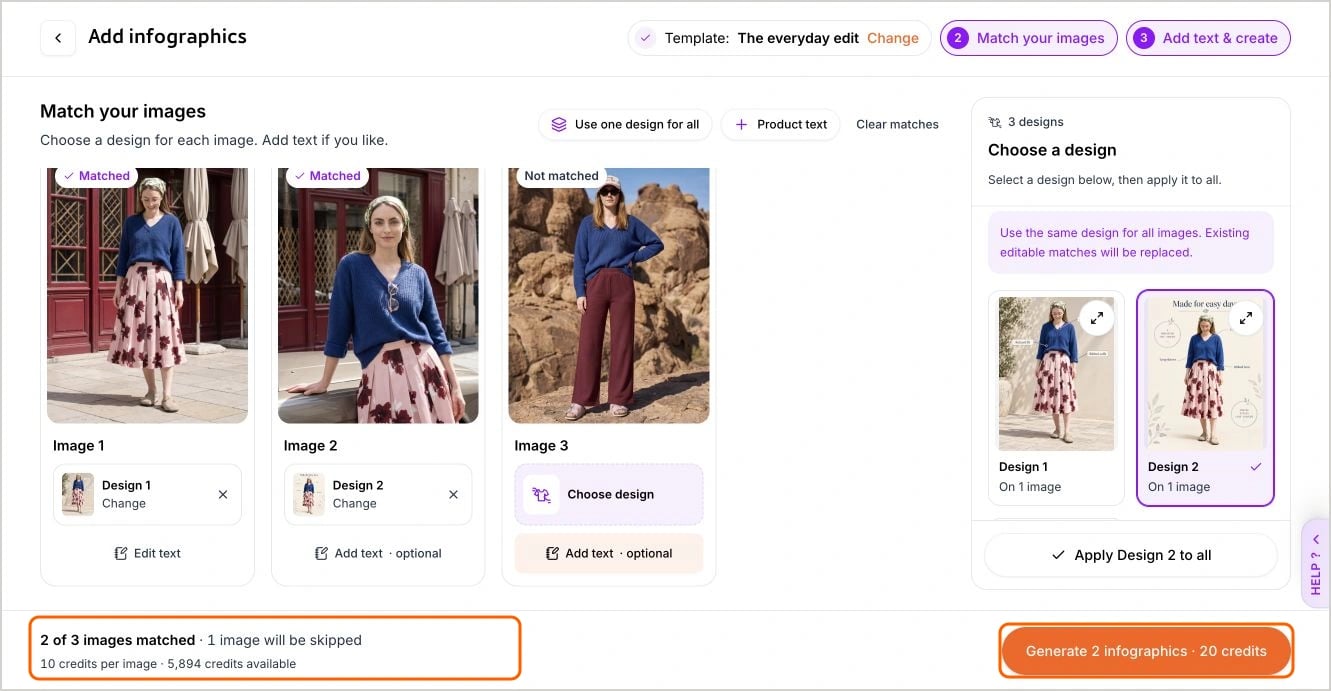
Pick a template from Your templates or the Starter collection, or search for one by name. Don’t have the right template yet? Click Create template, add your designs and click Save & use template. You’ll come straight back here with your new template selected. See Create Infographic Templates. To switch templates later, click Change next to the template’s name at the top of the page (on a phone, tap Change template). Switching clears your matches but keeps any text you’ve added.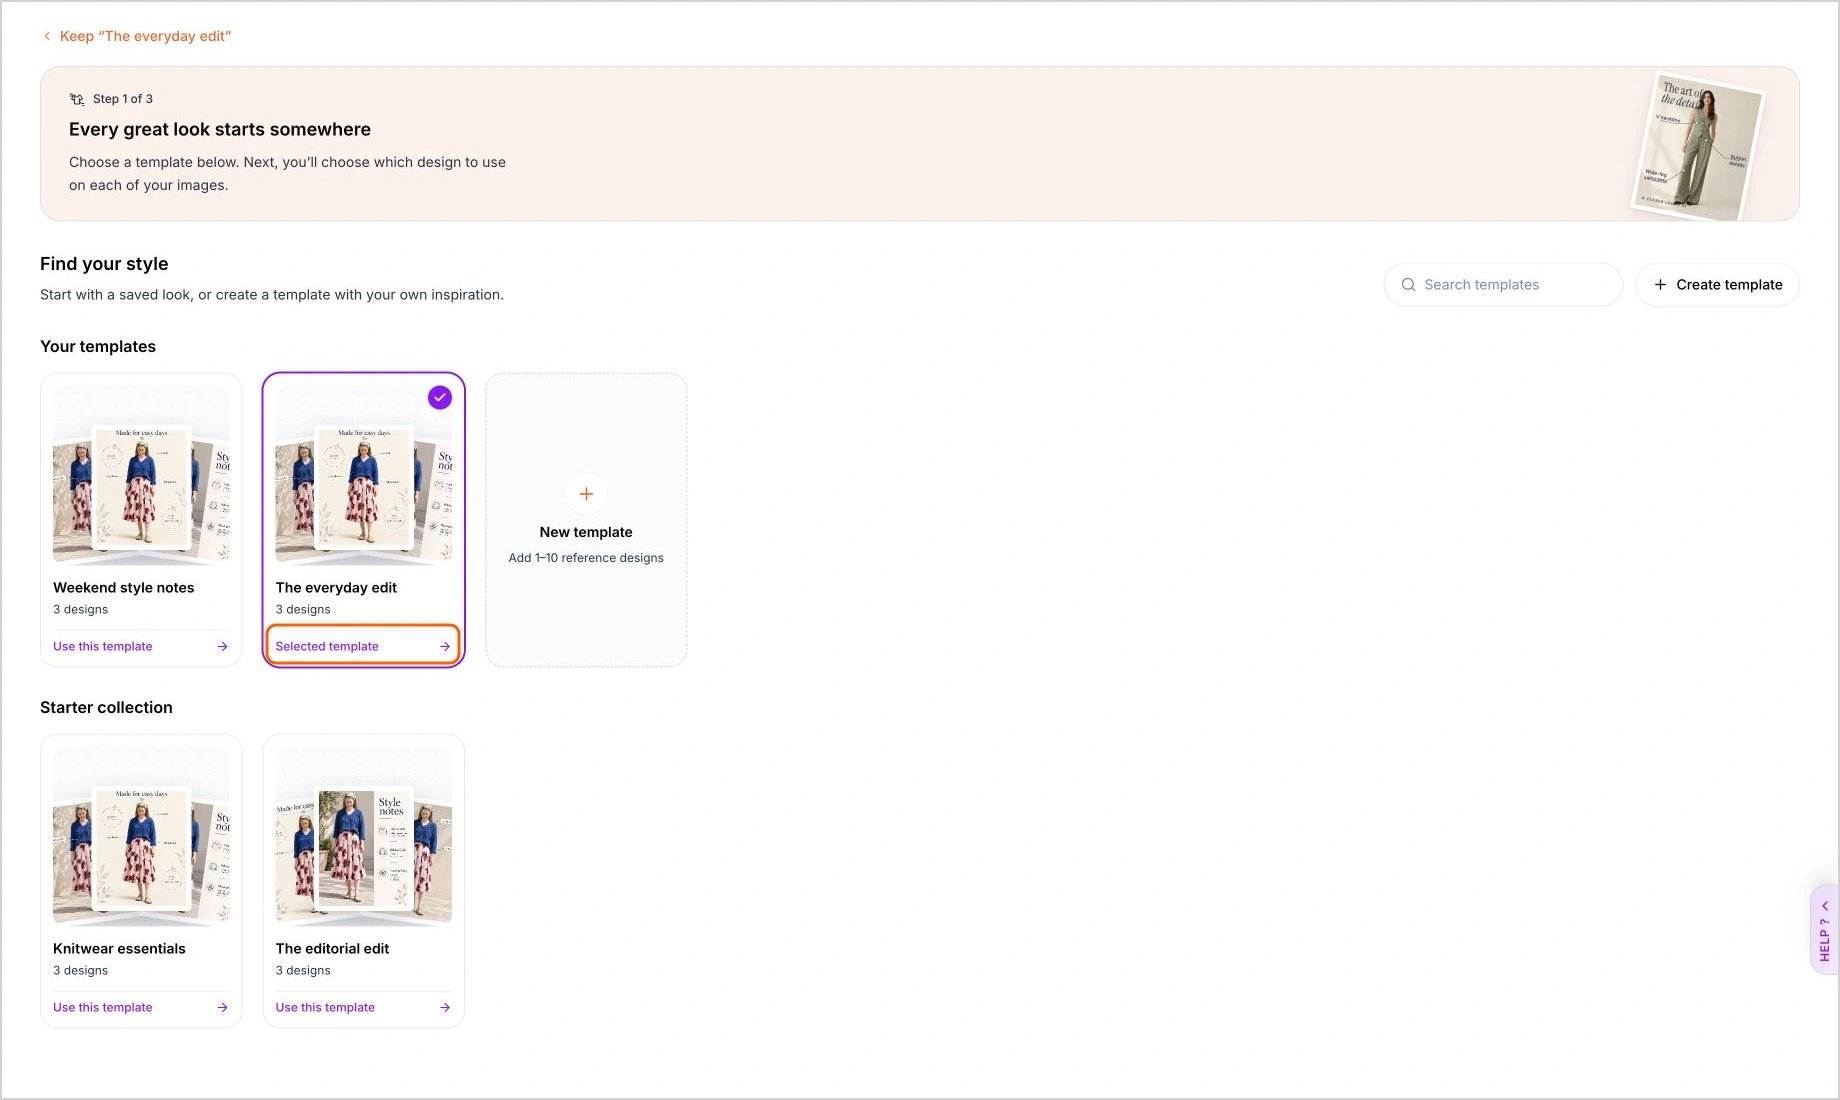
Step 3: Match a design to each image
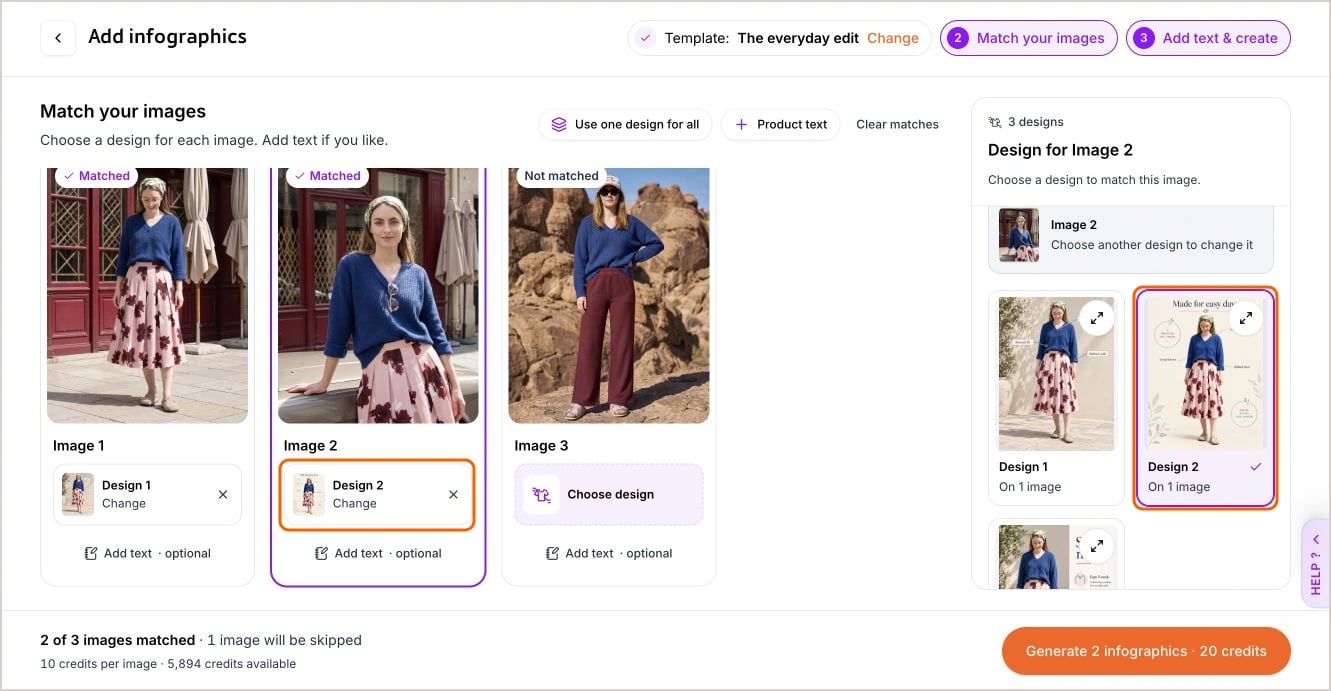
Each image needs a design from your template. Studio never matches them automatically, so you’re always in control of which look goes where.- Click an image (or its Choose design button), then click the design you want in the panel of designs on the right. On a phone, the designs open in a drawer.
- On a computer, you can also drag a design straight onto an image.
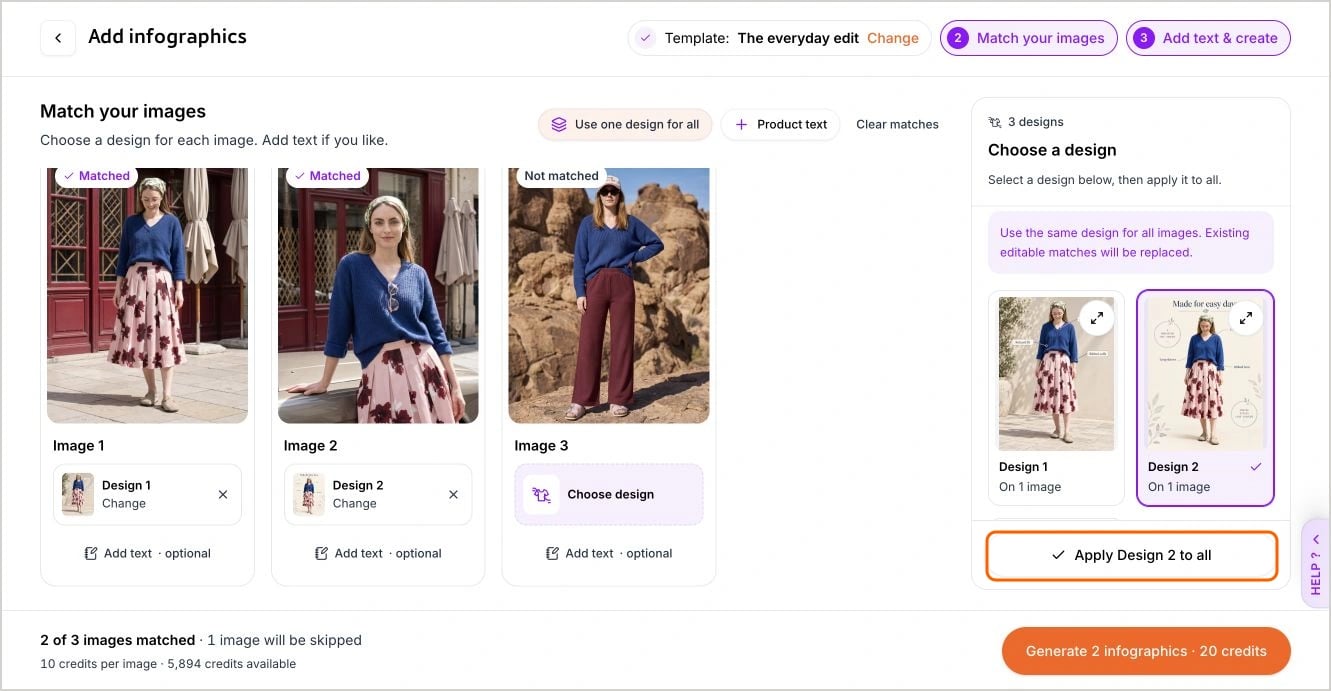
- To use the same design for every image, click Use one design for all, choose a design, then click Apply Design N to all.
- To change a match, click Change. To remove one, click the ×. Clear matches removes them all.
- Still in progress: The image is still being created.
- Being edited: The image is with our editing team.
- Replaced by an edit: An edited version has replaced this image. Use the edited image instead.
- Photoshoot cancelled: The photoshoot was cancelled.
- No image yet: The image doesn’t have a file Studio can use yet.
- Unsupported image type: This kind of image can’t take an infographic.
- Already sent for generation: You’ve already sent this image in this run.
Step 4: Add your text (optional)
Click Add text · optional on an image to tell Studio what its infographic should say, for example “V neckline, button front, wide-leg silhouette”. You can write up to 1,000 characters for each image. Leave it blank to highlight visible details instead, or to use your product text if you add some (see below). Studio keeps names, numbers and units as you type them, so double-check spellings and sizes, and check them again on the finished infographic. For more ideas, see Writing text.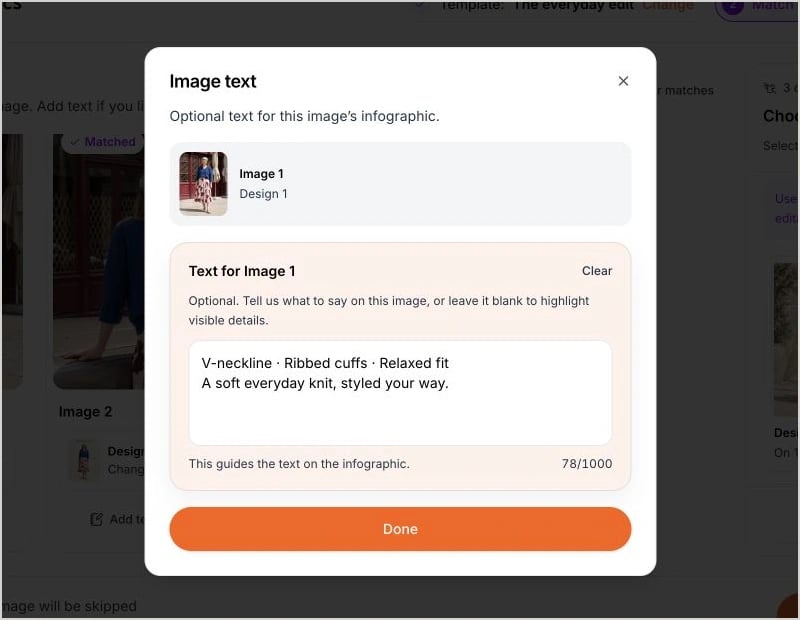
Product text
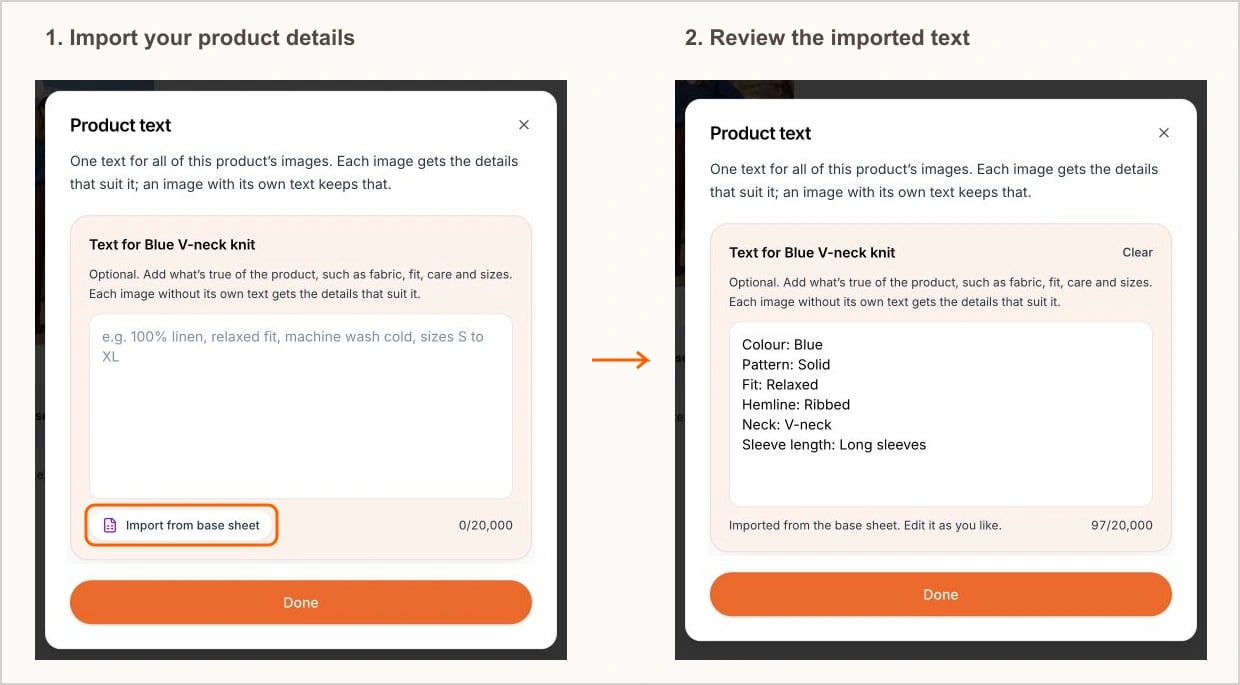
If you see a Product text button above your images, you can write one text for the whole product instead of writing it image by image:- Click Product text and add what’s true of the product, such as fabric, fit, care and sizes. You can write up to 20,000 characters.
- If your product has a base sheet, click Import from base sheet to fill it in automatically, then edit it as you like.
- When you create, each image without its own text gets the details from your product text that suit it.
- An image’s own text replaces the product text for that image, so include any product details you still want on it.
Step 5: Check the cost and generate
The bar at the bottom of the page shows how many images you’ve matched, the credits per image on your plan and the credits you have available. When you’re ready, click Generate. The button shows exactly what you’re creating and what it costs, for example Generate 2 infographics · 20 credits. Credits are deducted as soon as you click; there’s no second confirmation step. If you don’t have enough credits, the bar shows how many more you need, with a link to Add credits.