

Infographic templates are different from the photoshoot templates in Assets → Templates. Photoshoot templates set up models, poses and backgrounds for new photoshoots. Infographic templates style the infographics you add to finished images.
Starter collection and your templates
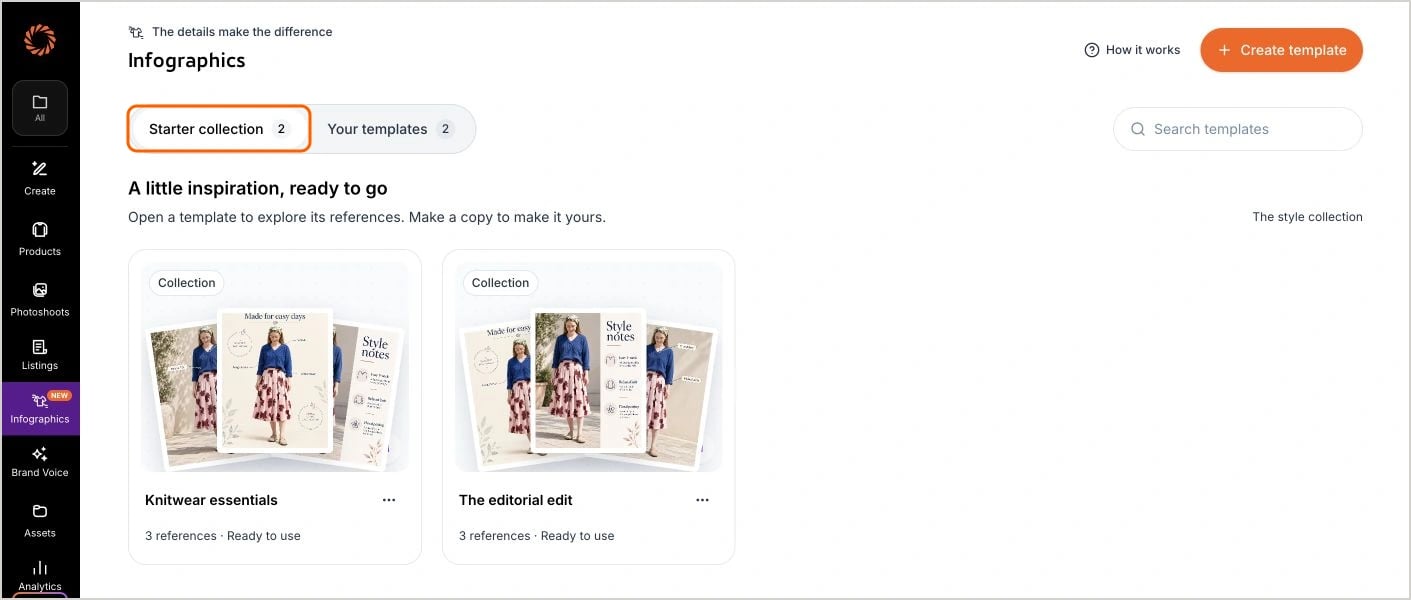
The Infographics library has two collections:- Starter collection: Ready-made templates from Ayna that you can use straight away. Open one to explore its designs. Starter templates are view-only; to change one, make a copy.
- Your templates: Templates made by your team. They’re shared with everyone in your organization, across all its brands, so your whole team can use the same looks.
Step 1: Start a new template
Click Infographics in the left sidebar, then click Create template. You can also click the Make it yours tile in Your templates.Step 2: Name your template
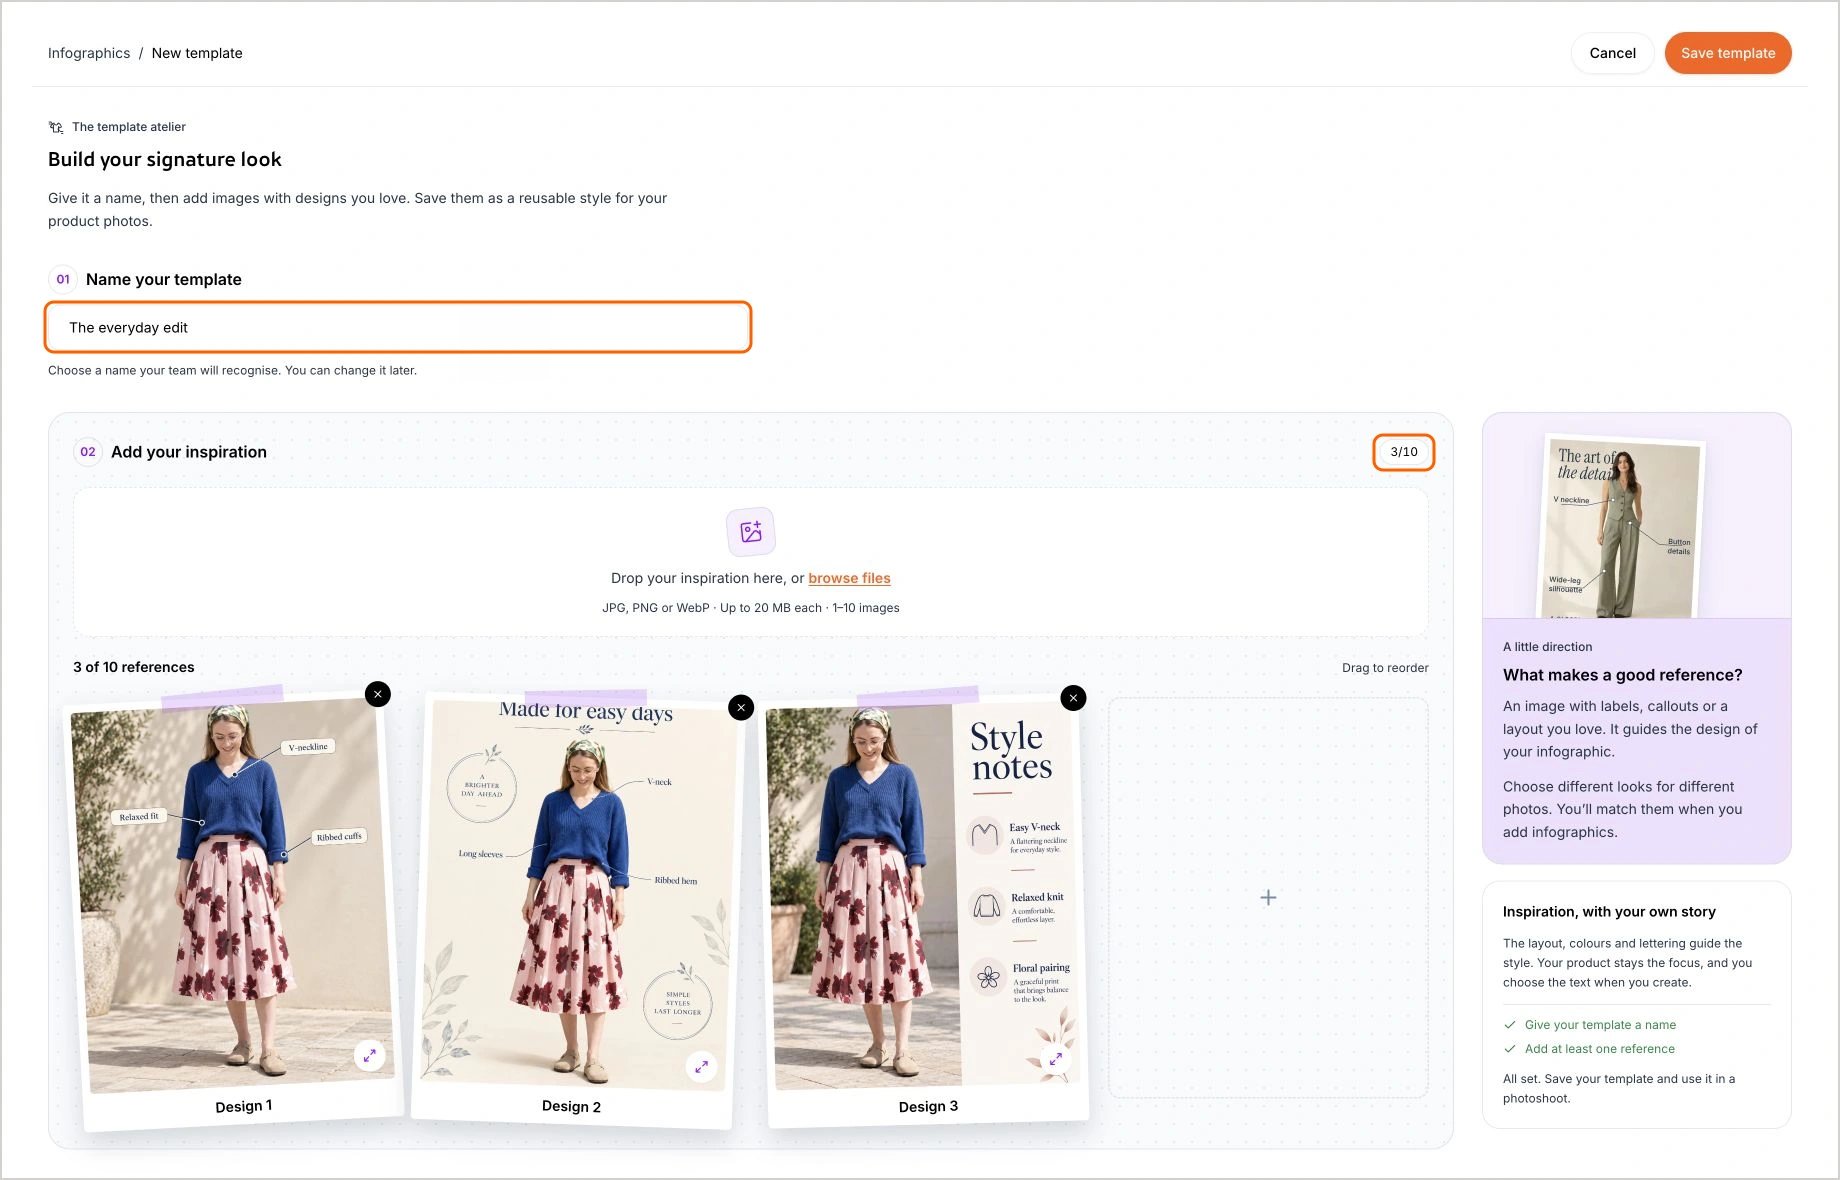
Under Name your template, enter a name your team will recognise, such as “The everyday edit”. You can change the name later.Step 3: Add your inspiration
Drag your reference images onto the board, or click browse files to choose them. On a phone, tap Choose reference images.- Use JPG, PNG or WebP images of up to 20 MB each.
- A template holds 1 to 10 reference designs. The counter (for example, 3/10) shows how many you’ve added.
- Each image becomes a numbered design: Design 1, Design 2 and so on. You’ll use these numbers when you match designs to your photos.
- Reorder: On a computer, drag a design to a new spot. On a phone, use the arrows.
- Preview: Click the expand icon on a design to take a closer look at its layout, colours and callouts.
- Remove: Click the × on a design.
- Retry: If an image fails to upload, click Retry upload.
Step 4: Save your template
Click Save template. The button turns on once your template has a name and at least one design, and all your images have finished uploading without errors. If it’s greyed out, the checklist in the panel next to your designs shows what’s missing. Your template now appears in Your templates, ready to use. If you click Cancel before saving, Studio asks whether to discard your changes. If you leave another way, for example through the sidebar or your browser’s Back button, your unsaved name and uploaded references are kept in this browser tab and come back when you open that template again, or click Create template again for a new one you hadn’t saved yet. Images that were still uploading, or failed, aren’t kept.Copy a starter template
To customise a starter template, open it and click Make a copy, or choose Make a copy from its ⋯ menu. The copy is added to Your templates, with “copy” at the end of its name, and you can rename it and add, remove or reorder its designs.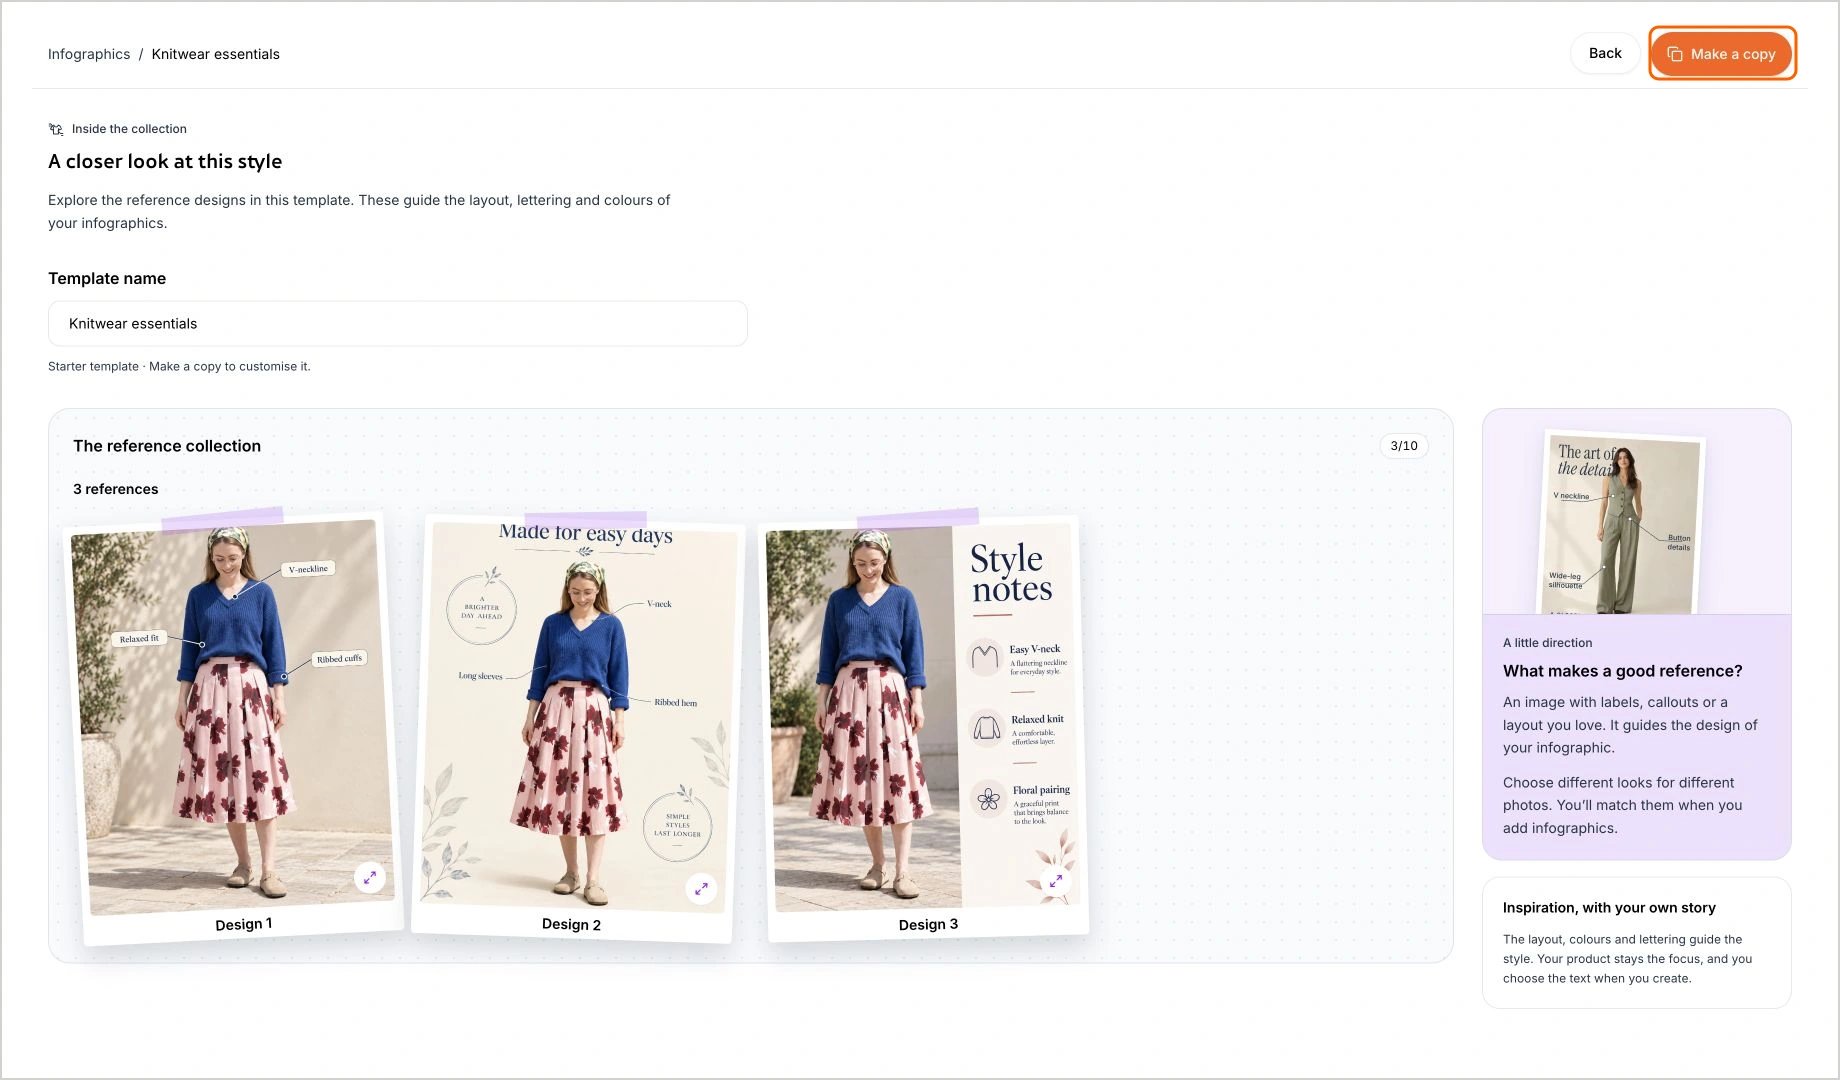
Edit, copy or delete your templates
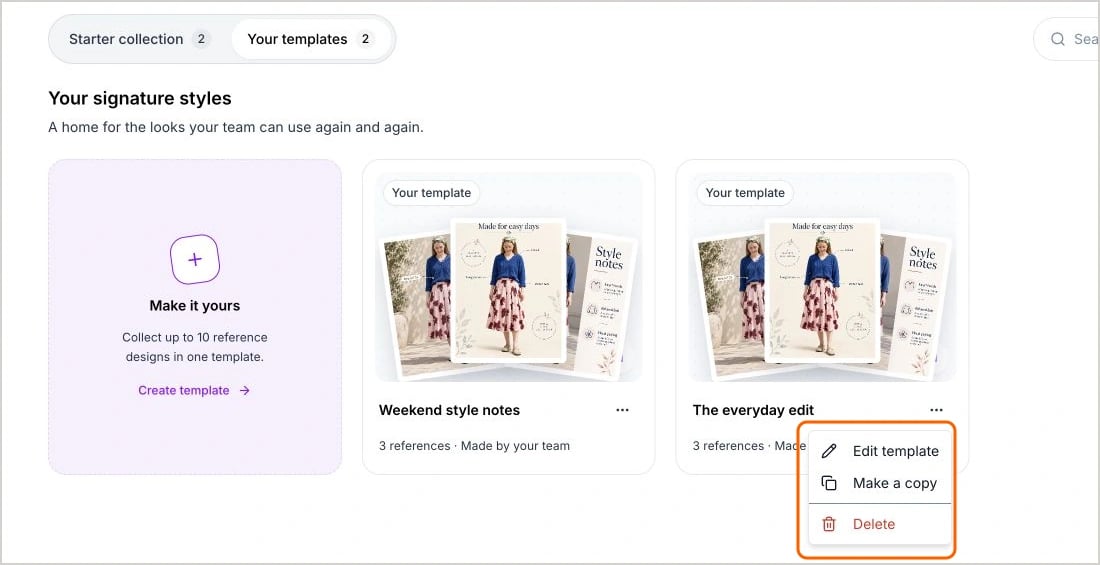
Open the ⋯ menu on one of your templates:- Edit template: Rename it, or add, remove and reorder its designs. Click Save template when you’re done.
- Make a copy: Start a new template from this one.
- Delete: Remove the template from the library for everyone in your organization.
Editing or deleting a template never changes the infographics you’ve already created with it.